Suspension bushes on all cars go through tremendous stress on a daily basis, some manufactures have got the design right and the bushes can last the life of the car whilst other manufactures just didn’t quite get there!
One of the problems with BMW’s in general is the front suspension bushes. Most of the BMW range suffer with the front suspension arm bushes either failing or being so worn that it causes the car to wander on the road whilst driving and can feel unstable when braking.
Replacing the bushes with either after market bushes or genuine bushes does sort out the problem, but with the condition of the UK roads and the fact that most BMW’s come with low profile run flat tyres the new bushes can be worn out within a couple of years.
The solution on this BMW Z4 was to fit some Power Flex nylon bushes, these bushes are mainly used in Motorsport but can be fitted to road cars.
Watch this video to see just how much movement was in the old worn bushes compared to the new Power Flex nylon bushes.
On the Z4 replacing just the lower suspension arm rear bushes was enough to transform the steering from a loose discouraging feel to a nice tight direct feel that a sports car should have.
For more information on whether Power Flex bushes would suit your car or just for more information give us a call on 01332 205070
A 2014 Citroen Berlingo came in to us with an ABS fault to be looked at.
First thing to do was carry out a diagnostic code read to see why the ABS light was on, the particular code for this Citroen Berlingo van related to an open circuit on the rear left wheel speed sensor.
We checked the actual wheel speed sensor for a fault but it checked out ok, next job was to check the wiring from the sensor back to the ABS pump.
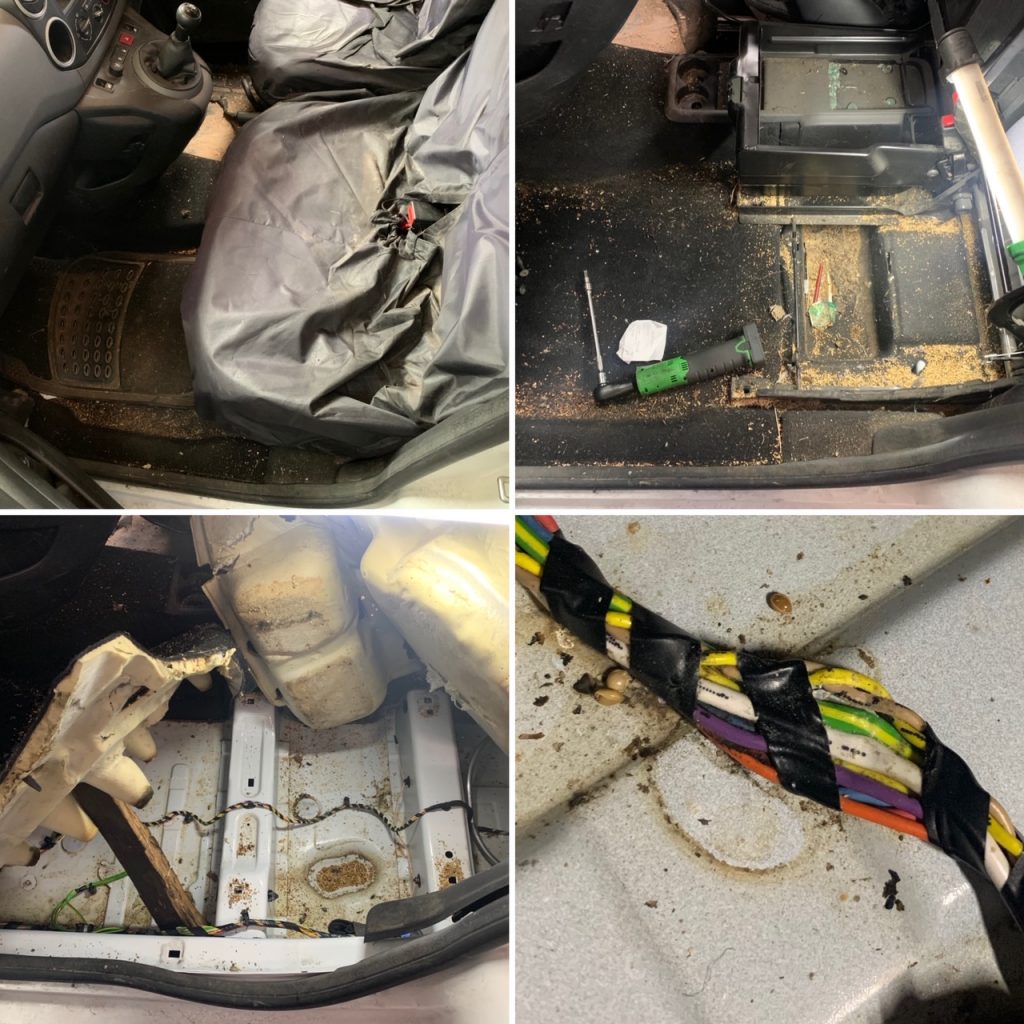
Most of the wiring for the rear ABS sensors is hard to access as it runs inside the van. once we had determined that there was in fact a break in the wiring from the left rear sensor and the ABS pump (by checking continuity of the wires) it was time to start stripping the interior and physically check the wiring for a break.
After removing the passenger seats and lifting the carpets to access the wiring we noticed part of the raised carpet flooring had been trapping the ABS wiring loom between a raiser and the body and over time had rubbed through the wiring and caused it to short out against the body.
We repaired the wiring and and rechecked for continuity through the loom which we now had. Time to clear the stored fault codes and check for a wheel speed signal using the live data on our diagnostic scanner, perfect, the signal was good and the same as the rear right wheel, time to rebuild and road test.
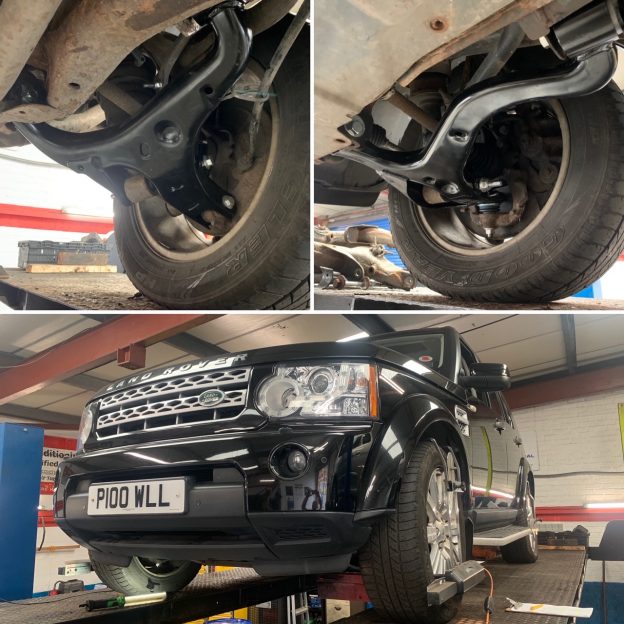
The owner of this Land Rover Discovery 4 decided he wanted to replace all four of the lower suspension arms as they had excessive wear in most of the bushes (common problem).
After a bit of research he booked it in with us to carry out the work for him.
Anyone who has tackled this job before will know its not a five minute job, especially when the bolts seize inside the bushes!
First thing we always do on jobs like these is to wire brush all the bolts and spray them with freeing oil in the hope to make life easier for us.
This did work on 50% of the bolts but there were several that no matter what we tried they needed to be cut out.
After replacing all the arms it was time for a full geometry setup as the arms had adjustments for Camber, Castor and Toe.
I must admit once all the work had been carried out the Discovery 4 drove perfectly, there was no more wandering at speed the steering was precise and not loose, it felt like it should do.
We did advise the customer to bring the Discovery 4 back after a few hundred miles so we could re-check the geometry once all the suspension components had settled in.
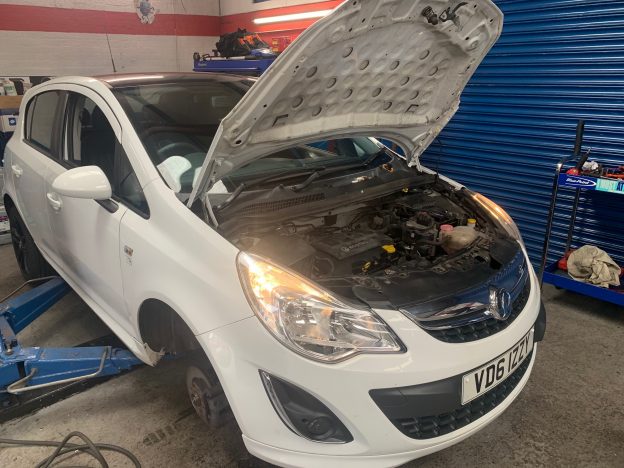
We had this little Vauxhall Corsa 1.2 booked in with us for a ‘really bad engine noise’.
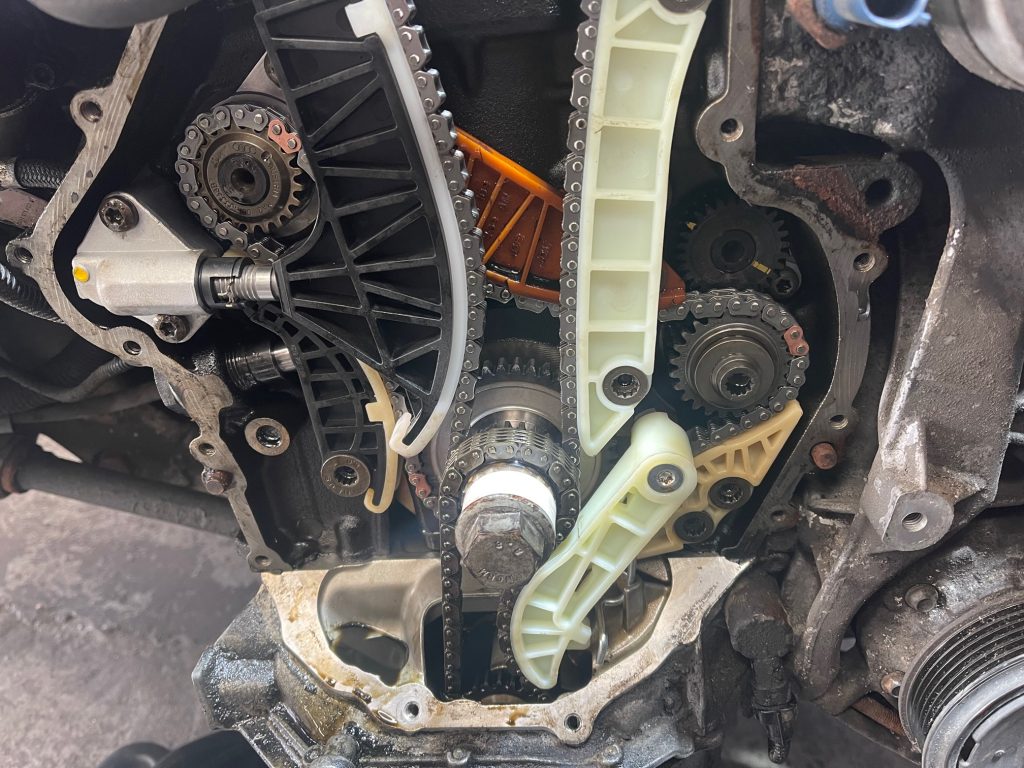
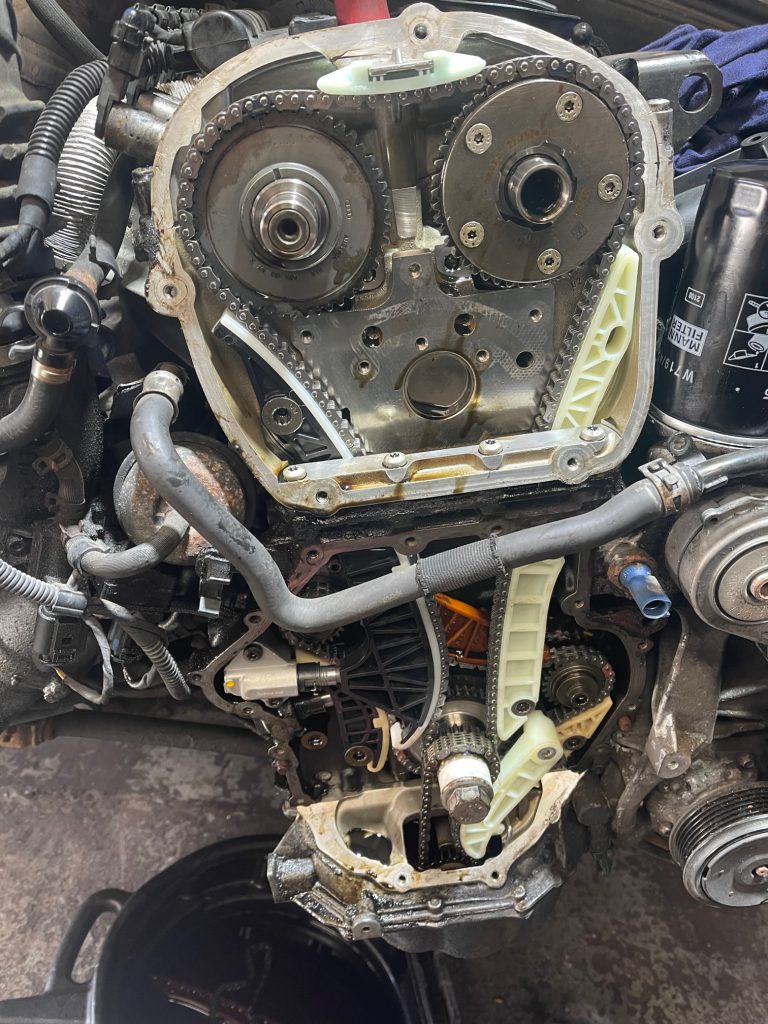
Once the car was in the workshop it became apparent very quickly what the noise was, the Timing Chain was rattling so bad we were surprised it hadn’t jumped a tooth and caused engine damage!
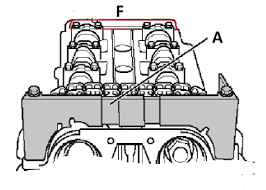
When we were stripping the engine down to put the Timing Tools in place we could see just how badly stretched the chain had become, the crank locking pin went straight in but both cam shafts were out by quite a lot.
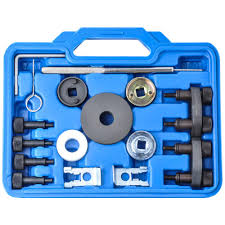
There are several variants of the Vauxhall timing chain engines most of which requiring different timing tools which we have, 1.0 – A10XEP, 1.0 – A10XER, 1.2 – A12XER, 1.2 – A12XEL, 1.4 – A14XEL, 1.4 – A14XER, 1.4 – A14NET to name just a few.
After removing the timing chain cover we could start to see what had caused the problem, the oil was very black and there was a lot of burnt carbon oil inside all the covers.
All engines require regular servicing to keep them in tip top condition but especially modern engines that run a timing chains rather than a timing belt, we are seeing more and more engines requiring timing chain kits prematurely due to a lack of servicing, poor quality oil or the wrong spec oil.
Once we had replaced the timing chain kit and re-aligned all timing marks it was time to clean all off the engine casings and refit, replace the oil and filter and refill the coolant.
When we removed the oil filter this gave us another indication of what had caused the problem, the middle of the oil filter had been sucked in, caused by the paper element of the filter being completely full of oil carbon and struggling to allow fresh oil through it, which in turn starves crucial parts of the engine of oil (timing chain) allowing them to wear, over heat and stretch.
On this particular car we advised the customer that over the next 20,000 miles they should have several oil and filter changes to help remove carbon deposits that we couldn’t see or get to whilst doing the job and this will help increase the life of their engine.
We recently came across a problem in the Garage which we have not come across before, which was the ‘Low Oil Pressure’ warning light coming on after replacing the Oil and Filter on a 2019 Ford Ranger 3.2.
After searching on a couple of the Motor Trade platforms we use it seemed that we were not the first to come across this problem, but we spoke to our local Ford Dealer and they said they knew nothing about it.
There was apparently a technical bulletin which had gone out to dealers saying that if the oil and filter change was not completed within fifteen minutes this problem would occur due to the oil pump draining and not being able to re-bleed itself.
Personally we believe this is a poor design, when we drain the old oil from your car we want to remove as much of the old oil as possible (obviously some oil will stay in certain places of the engine) allowing the new oil not to be diluted with it.
In this particular case the only way we could bleed the oil pump was to flood it, we added five litres more oil than specified to bring the level inside the sump up to the bottom of the oil pump meaning it didn’t have to pull the oil up but just push it.
Once we had got the oil pressure up we drained off the extra five litres of oil, road tested the car and then re-checked the level.
A Vauxhall Mokka came into the garage today with its engine management light on in need of some diagnostic work to find out the reason why.
After speaking to the customer we soon found out that we were not the first Garage to look at the Mokka.
It had gone into another garage who had replaced the ignition coil pack due to diagnostic trouble codes relating to cylinder miss fires, the coil pack cured the problem and the customer left happy.
After a couple of days the engine management light came on again so back to the Garage she went.
This time the diagnostic codes related to Oxygen sensor (lambda) faults? But rather than checking live data on the scan tool or checking the sensors with an oscilloscope they proceeded to change the sensors and clearing the fault codes to turn off the engine management light.
After another couple of days the light came on again but rather than take the car back to the same garage the customer looked on Google and found us, gave us a call and got herself booked in.
Once the car was in our workshop we plugged in our Diagnostic scanner and carried out a full code scan of the vehicle, all modules were clear of codes except for the Engine Control Module (ECM) which had codes relating to ‘Oxygen sensor faults’.
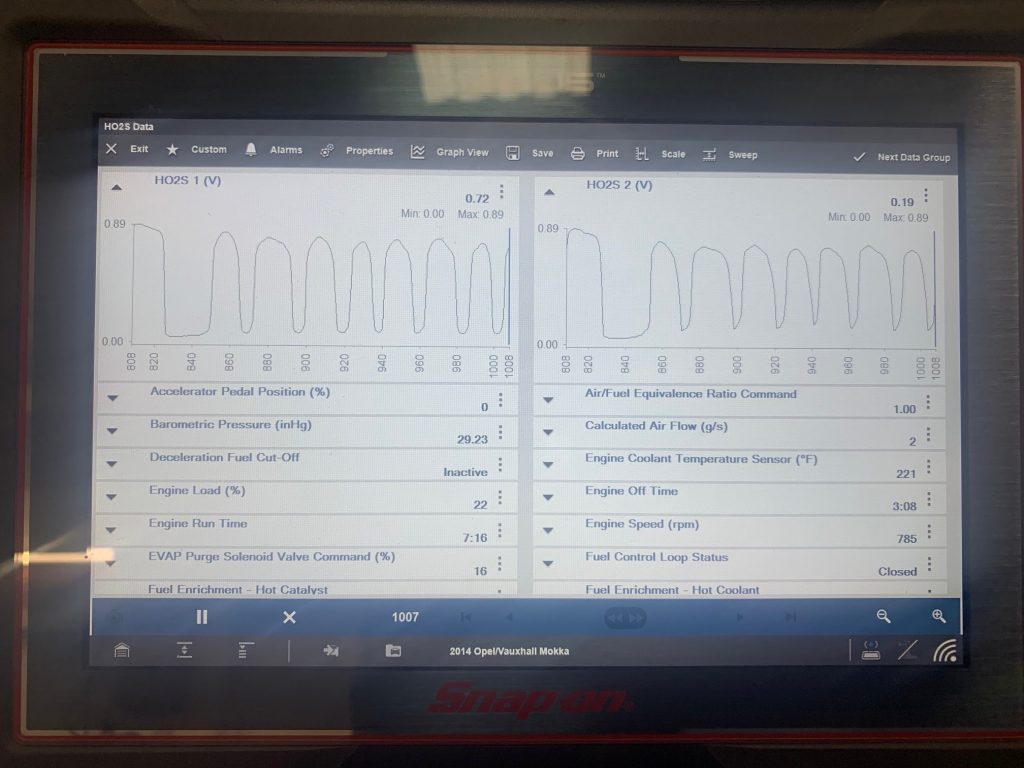
We then carried out some live data testing on the Oxygen sensors to see what was happening, straight away we could see a problem, both Oxygen sensors were reading the same, this is not good!
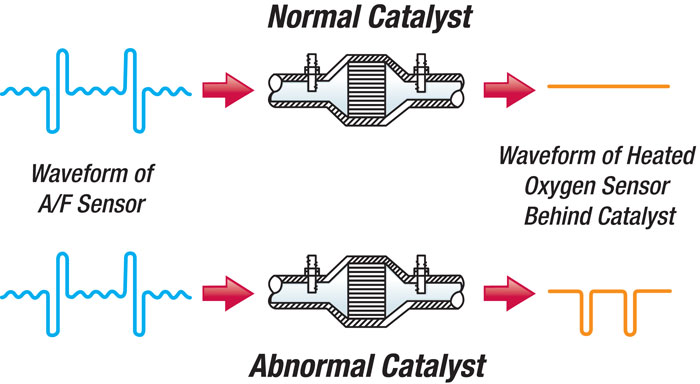
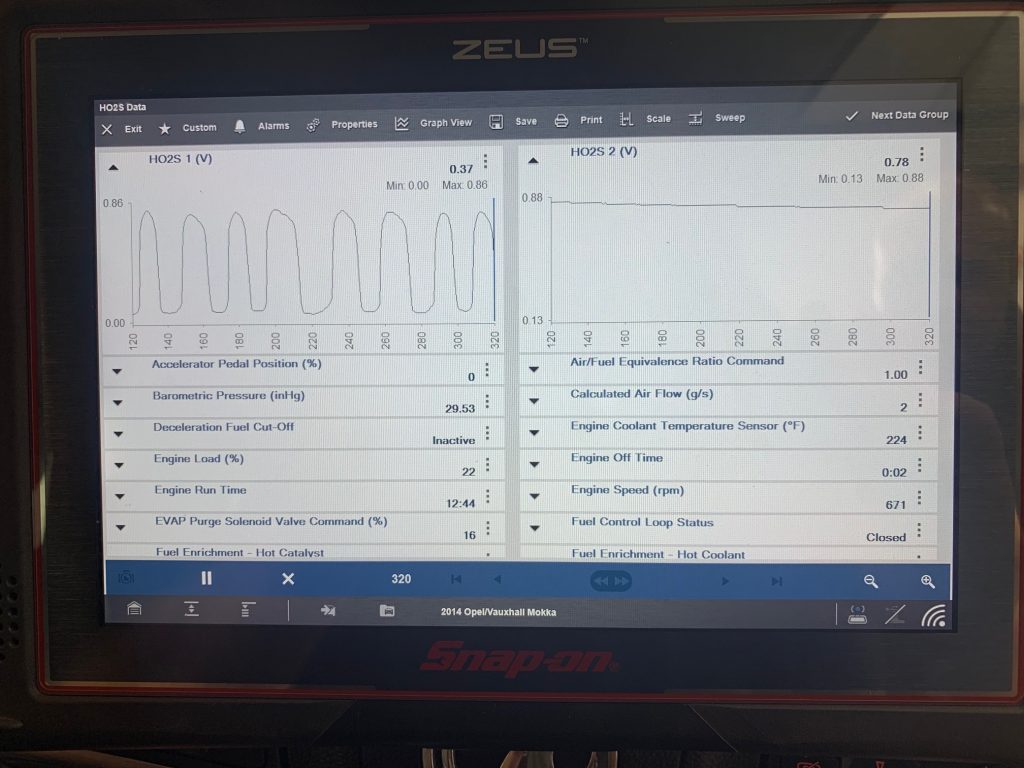
The basics of Oxygen sensors are that they read the gases which are being produced by the engine before and after the Catalytic Converter, and if the Catalytic Converter is working correctly the first sensor should be switching and the second sensor should be pretty static (on idle), if this is happening then the gases coming out of the Cat are cleaner than the gases going in to the Cat meaning lower carbon emissions.
Once we had checked the Oxygen sensors were working properly (not giving false readings) we needed to check the Cat’s internals to see why it wasn’t working.
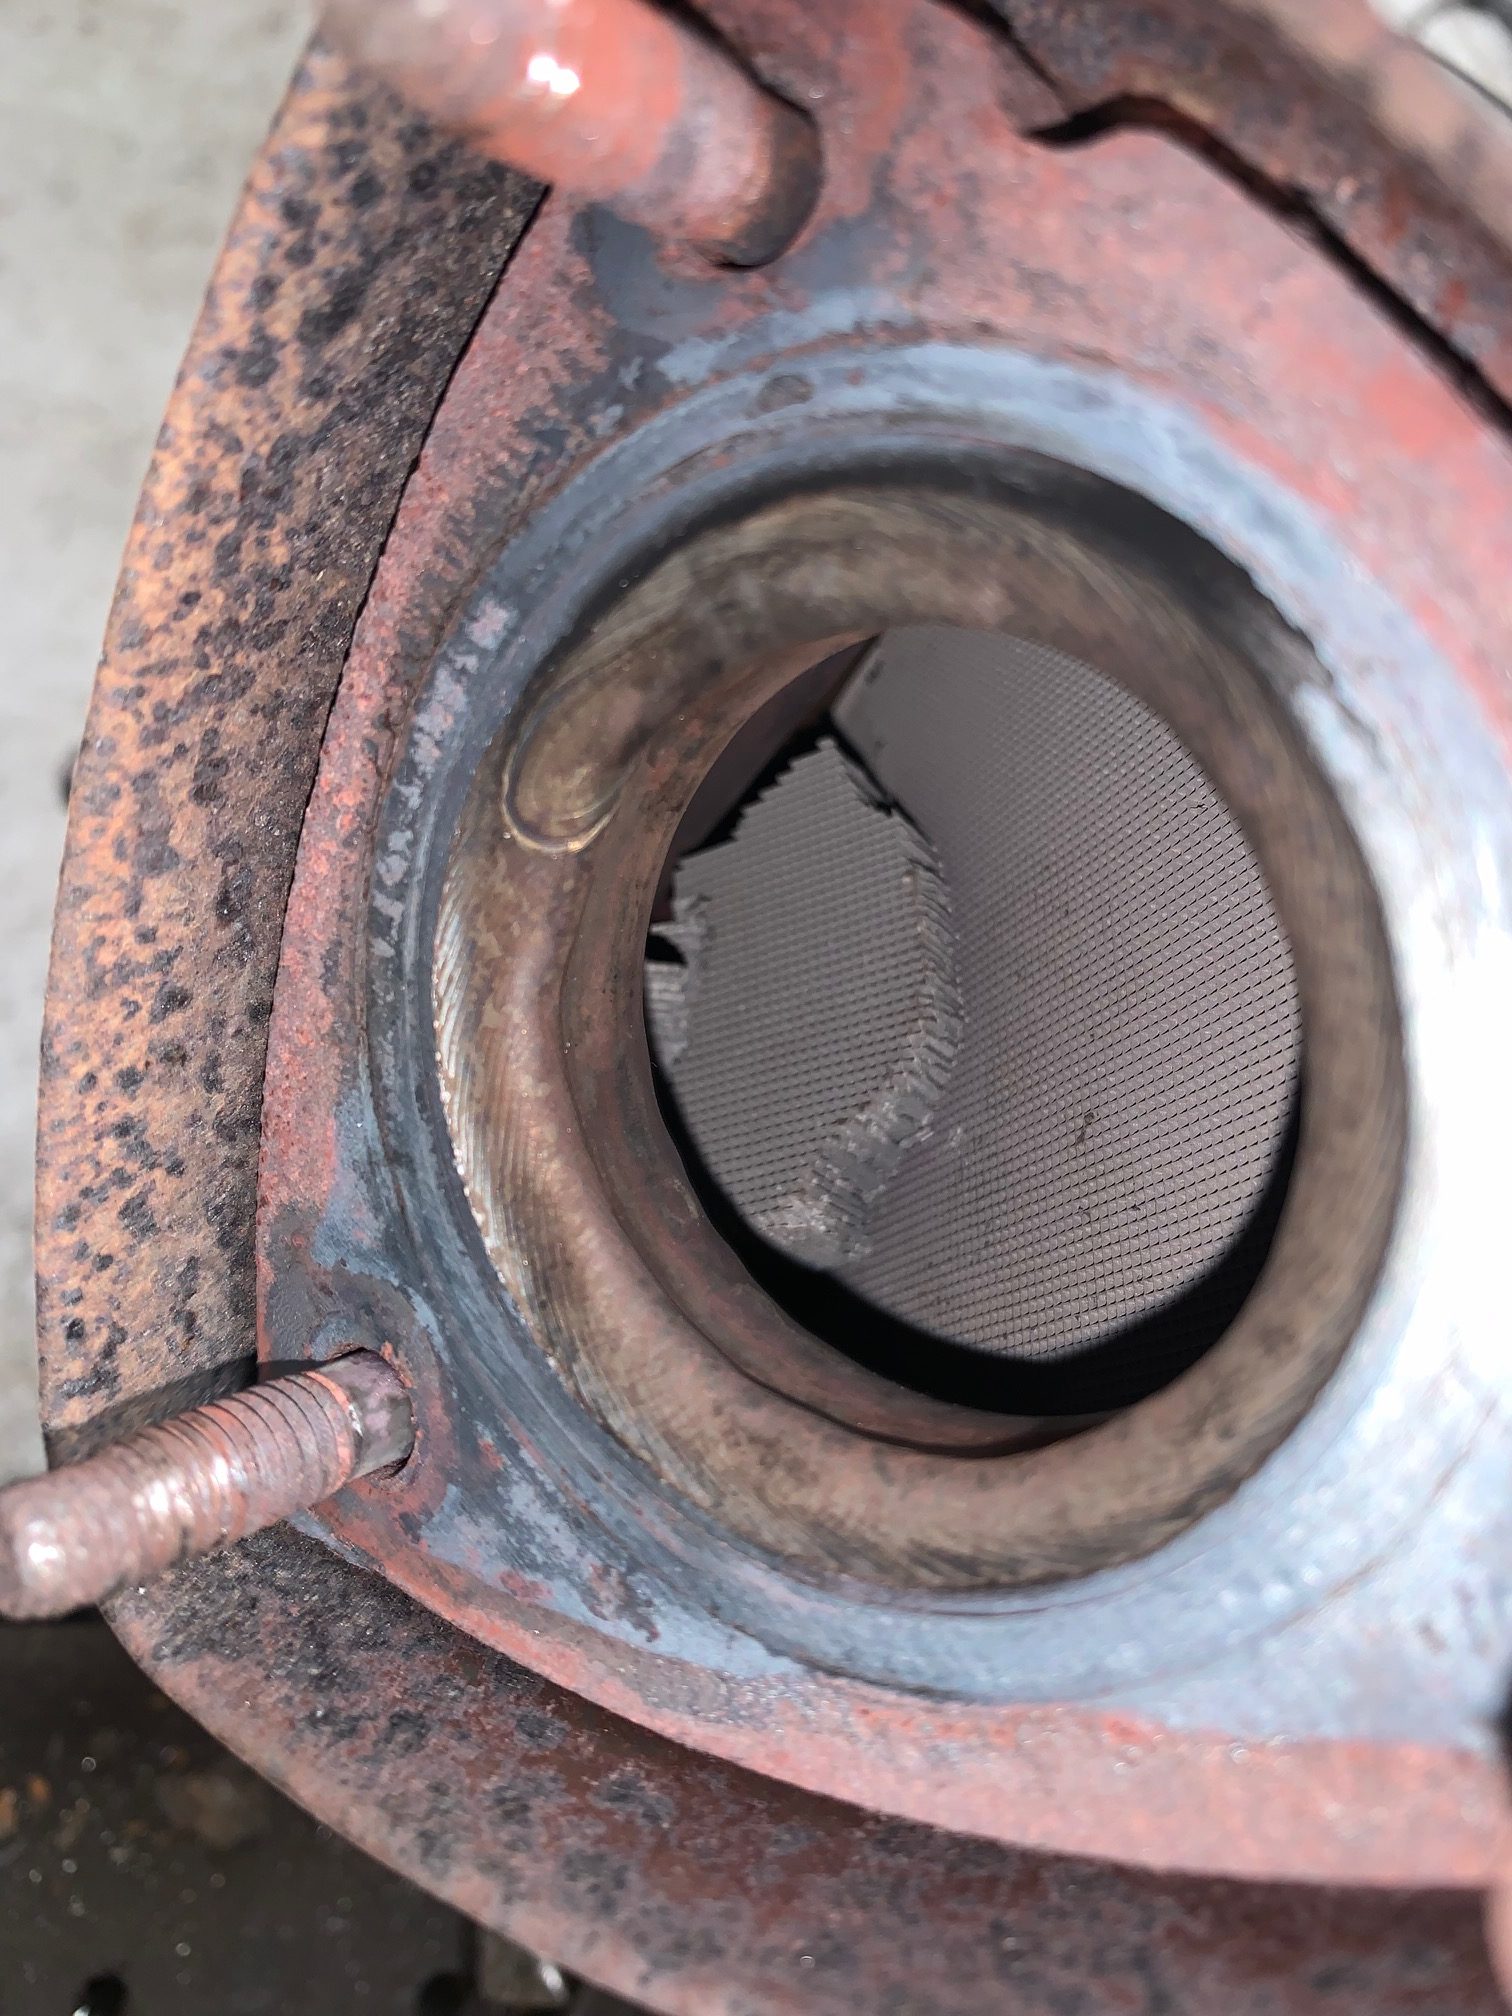
With the Cat removed it was obvious why we were getting the same readings on our live data, the honey comb centre of the Catalytic Converter which catches and burns off the carbon from the engine had broken up and was allowing the gasses to pass by.
A new Cat was fitted and we ran another scan, this time no codes returned and the Oxygen sensors were working as they should.
The customer now has a car which is working as it should, more economical and with a lower carbon output.
The government has confirmed that it will reintroduce mandatory MOT testing from 1st August 2020 in line with gradually easing lockdown restrictions and rising traffic levels.
Drivers had been given a six month extension of their vehicles MOT certificate to discourage non-essential travel and free up garages for repair work to essential workers’ vehicles. The scheme was set to run until March 2021 but will now end in a month’s time.
The extension still applies to all MOT certificates due to expire before 1st August, but from that date onwards, drivers must have their car’s roadworthiness tested within a year of their last test. Irrespective of whether the extension applies, penalties still apply to vehicles found to be in an unsafe condition.
Figures from the Department for Transport (DfT) show that the UK’s service sector has ramped up as restrictions on travel have eased, with more than 90% of UK garages now operating and testing capacity now at 70% of normal levels.
Baroness Vere, roads minister, said: “As people return to our roads, it is vital that motorists are able to keep their vehicles safe. That’s why as restrictions are eased, from 1st August 2020 MOT testing will again become mandatory.
“Garages across the country are open and I urge drivers who are due for their MOT to book a test as soon they can.”
Any vulnerable or self-isolation drivers are advised to contact their local garage, as many are offering vehicle collection and drop-off services to aid social distancing.
The majority of UK garages are still conducting MOT tests, and drivers are able to have their car tested voluntarily. Any MOT certificate issued after the original date of expiry will only be valid until that date the following year.
Stuart James, chief executive of the Independent Garages Association (IGA) – which has campaigned for the government to lift the extension – welcomed the announcement but expressed concern about the safety of many cars on UK roads. “This is a welcome retraction of a policy doubtless designed to provide relief to motorists”, he said. “However, this additional month will allow at least 1 million unroadworthy cars to remain on the road for an additional six months, as well as the 1.6 million dangerous vehicles that have already had their MOT extended.
“With road traffic increasing, people being encouraged to use their cars rather than public transport, and further lockdown measures easing on 4 July, we believe this additional month will leave a number of motorists with an accumulation of faults and repair costs when they are least able to afford them. Even though this scheme has only been in place for four months, it has detrimented the roadworthiness of many cars, taken away the bread and butter of the independent garage sector and left a great number of consumers confused.”
Audi’s little S1 Quattro rocket ship has had a few problems when it comes to its cooling system, this water pump – thermostat housing has had seven re-designs since its original design due to failing water pumps and leaking joints.
To replace the water pump – thermostat housing on the Audi S1 Quattro is a fairly big job, we have to:
Drain the cooling system
Disconnect fuel lines and cooling hoses
Remove inlet manifold stabiliser bars
Remove the complete inlet manifold
Unbolt water pump drive cover
Remove the water pump and housing
Clean all surface faces and hose joints
Rebuild using genuine parts and all new seals
Refill with anti freeze and bleed cooling system
Road test and re-check
The water pump is driven off a small drive belt running from an internal engine shaft and should be replaced along with the water pump – thermostat housing.
Once all the work was carried out and all final tests done the car was handed back to a very happy customer.
This little Citroen DS3 came into us to have a look at due to the engine cooling fan running at full speed.
Firstly we carried out a Diagnostic Code Read on the vehicle, this didn’t help as it had no codes for anything let alone for the cooling fan fault!
Secondly through our Diagnostic Scanner we can operate certain modules on the engine to help us fault find, one of the modules is the high and low speed cooling fans.
When we operated the cooling fans only the high speed fan would work, this gave us a place to start, we removed the cooling fan control module to find that the resistor for the low speed fan had burnt out and required replacing.
When we rang the dealer they had six on the shelf! Always a good sign as common problem parts are always well stocked at dealerships.
Once we had replaced the cooling fan control module (resistor) we carried out another module test using our Diagnostic Scanner and it worked perfectly on low speed and high speed.
After a quick road test to make sure the fans worked with the air conditioning and when the DS3 was up to temperature it was time to hand it back to a very happy customer.
The Renault TWIZY is a 100% electric vehicle, consisting of a battery power source, electric motor and gearbox. It is an urban electric two-seater that is super fun to drive on warm sunny days.
This particular TWIZY came in for a few service items to be carried out to keep it in tiptop condition ready for our UK summer.
First job was the ‘Gearbox oil change’ but as the TWIZY is to small to fit on our ramps we had to carry this out on the floor using jacks and axel stands.
The Renault TWIZY’s gear box can get noisy over time due to the additives in the oil failing due to age and heat so it is advised as a service item to have it changed.
Once the TWIZY is safely up on the axel stands remove the under tray which will allow you ta see the gearbox.
Remove the 6mm allen key drain bung from the bottom of the gearbox and allow the oil to drain into a catch bowl, the drain bung has a small magnet on it which is designed to catch any small metallic filings from inside the gearbox, make sure you check for this and clean it before replacement.
Once the oil has completely drained refit the drain bung making sure to use a new sealing washer.
To refill the gearbox remove the 6mm allen key fill bung located above the drain bung (looks more like a bolt).
Fill the gearbox using either a fluid pump or gravity bottle, as the fill hole is very small it can take a while to get the oil in.
Refit the under tray, remove axel stands and carry out a road test.
Brake Fluid Change.
The second job on this little TWIZY was to carry out a full brake fluid flush, which consists of sucking the brake fluid through all four brake callipers until all the old fluid in the system is replaced with new fluid.
The reason for brake fluid changes is that brake fluid has hygroscopic properties which basically means it absorbs moisture from the air.
Brake fluid can reach some very high temperatures under heavy braking but it has a boiling point of around 250 degrees Celsius. As the Brake fluid starts to absorb moisture from the air this boiling point starts to get lower until eventually it becomes so low that even under normal braking the fluid will start to boil and cause brake fade.
This being said a lot of garages use ‘Brake Fluid Changes’ as a regular add on to a Service. We however carry out a moisture content test as part of our Service and only replace it when it is required, unless it is stated for warranty purposes of course.