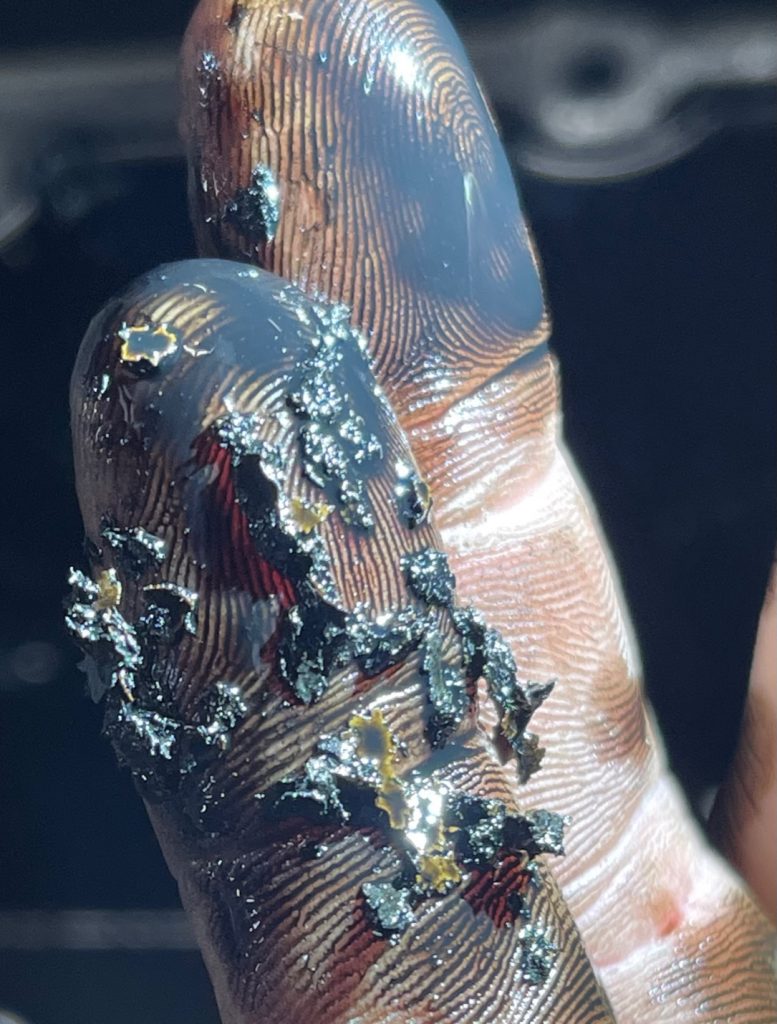
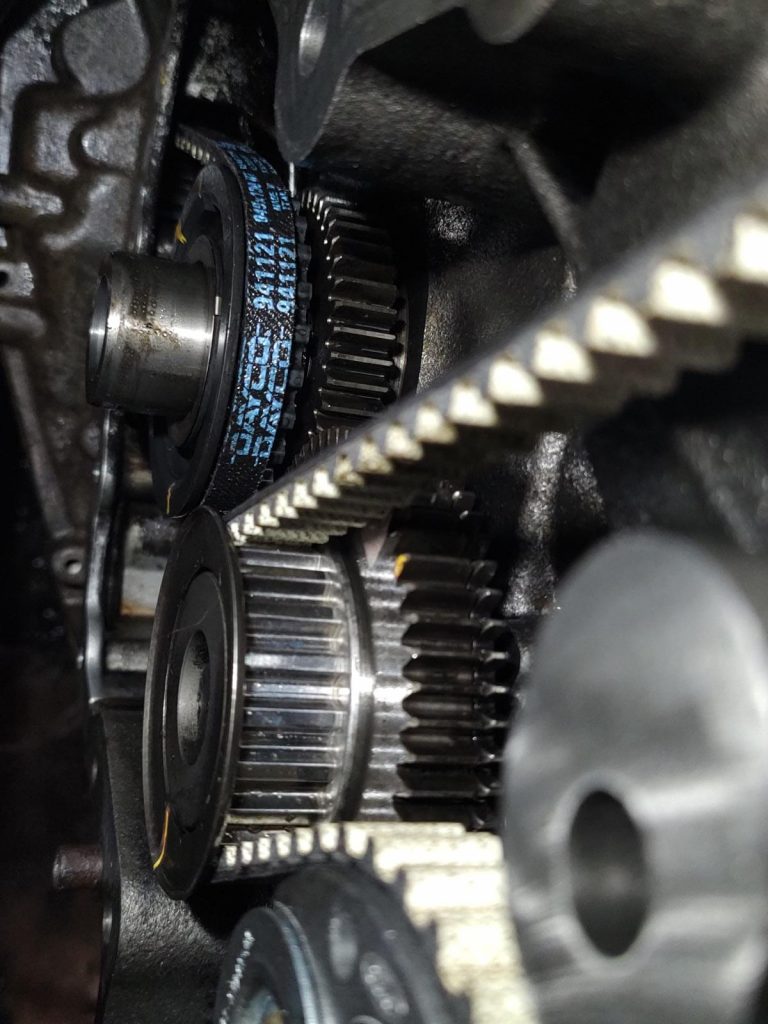
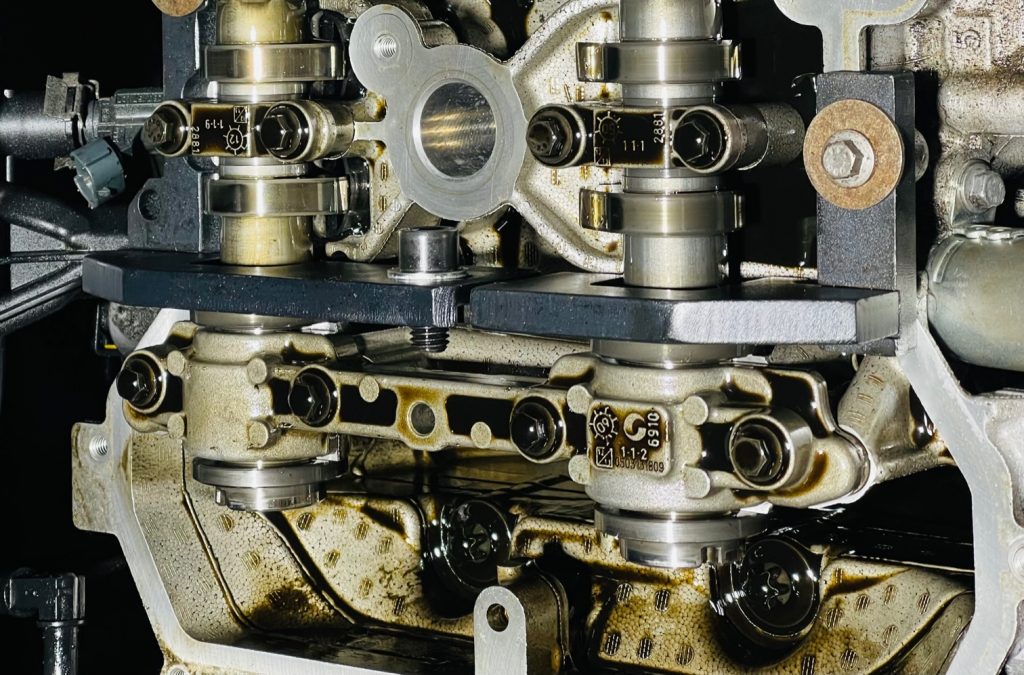
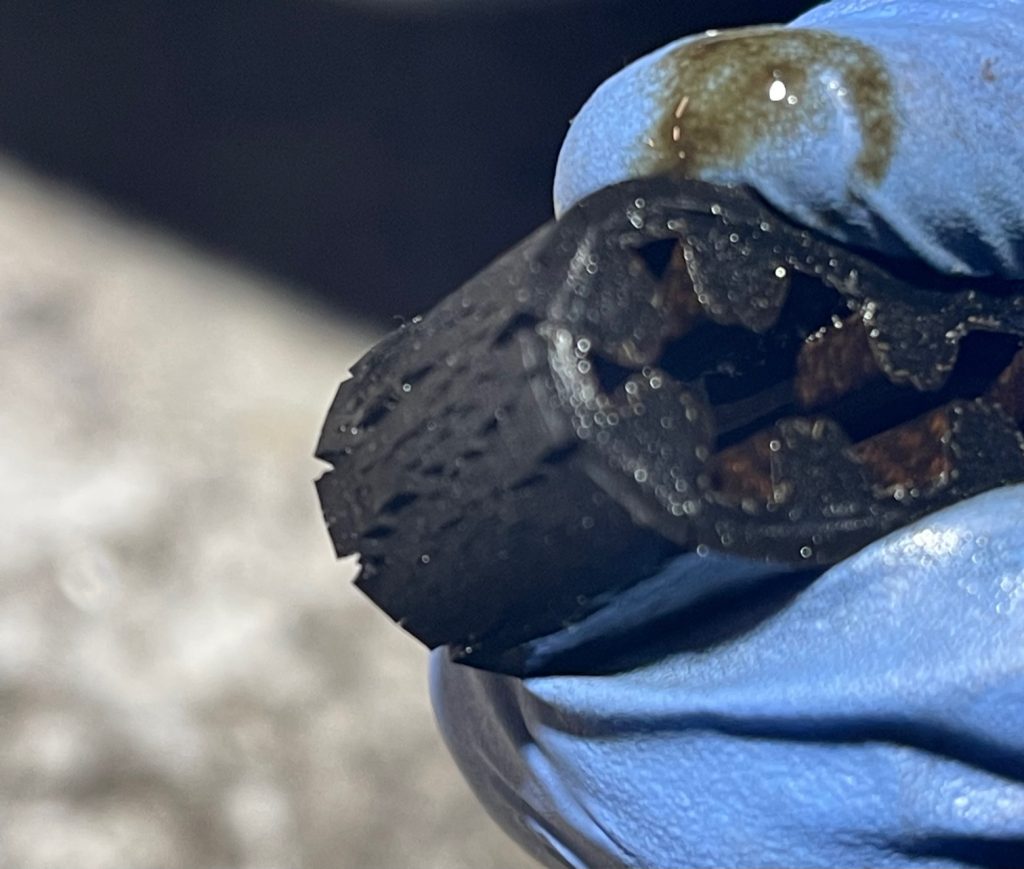
This little Peugeot 208 1.2 vti was booked in to have its wet belt replaced due to another garage noticing rubber in the oil when it was serviced.
”Make sure to use vehicle specific oil when Servicing”
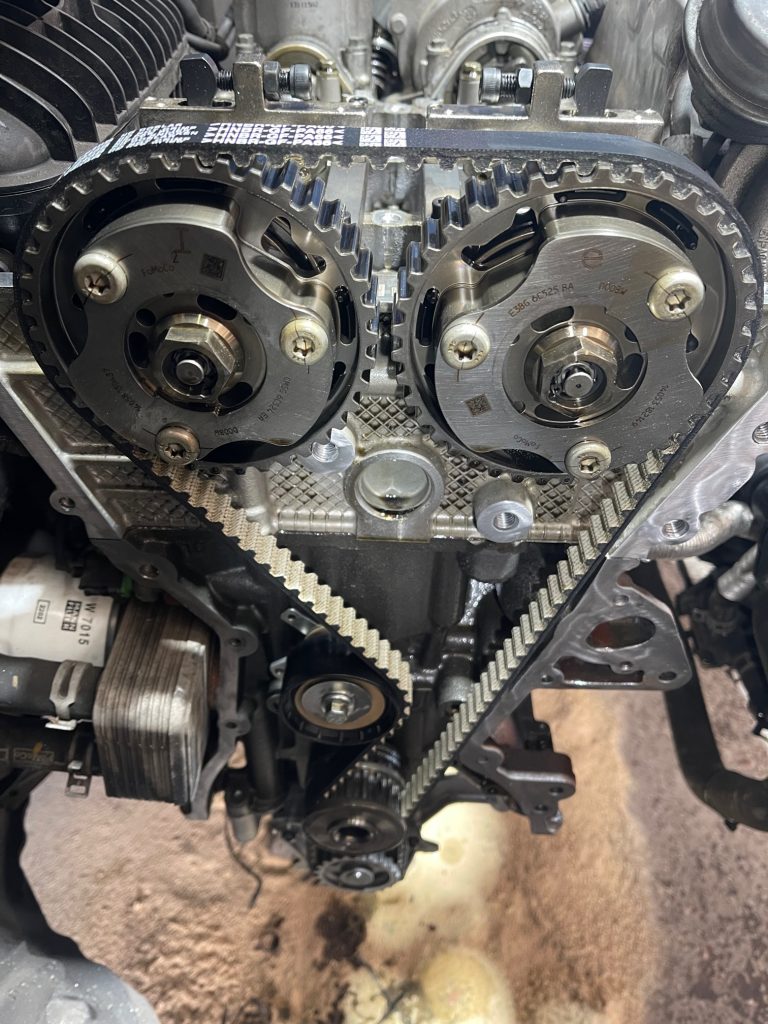
Once we had stripped down the engine to access the wetbelt we had to fit the timing tools to the camshafts and flywheel.
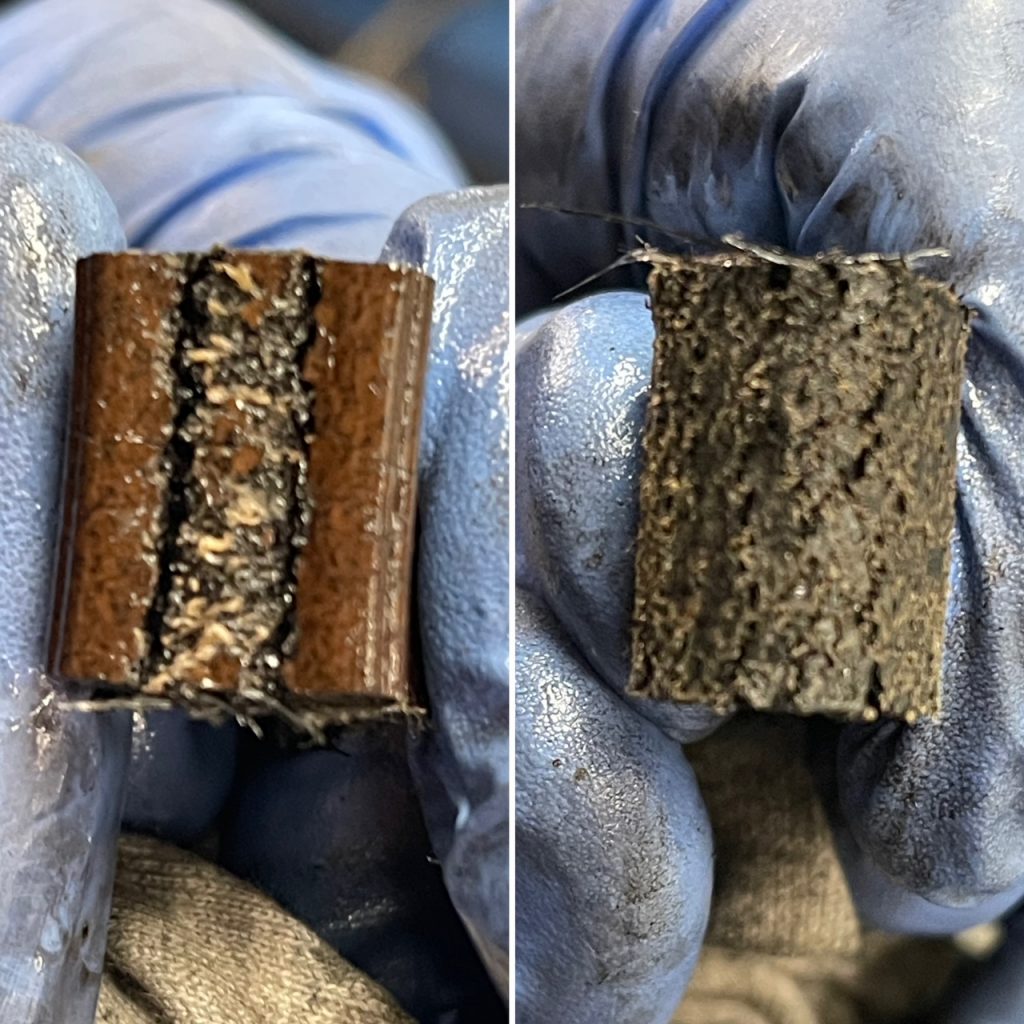
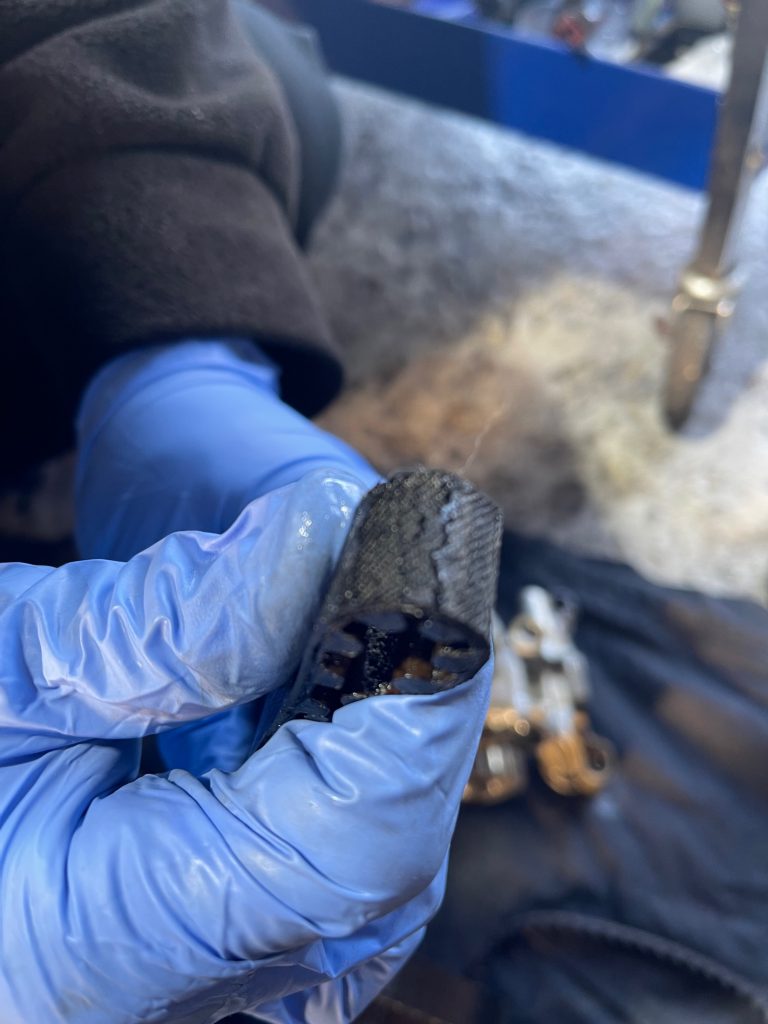
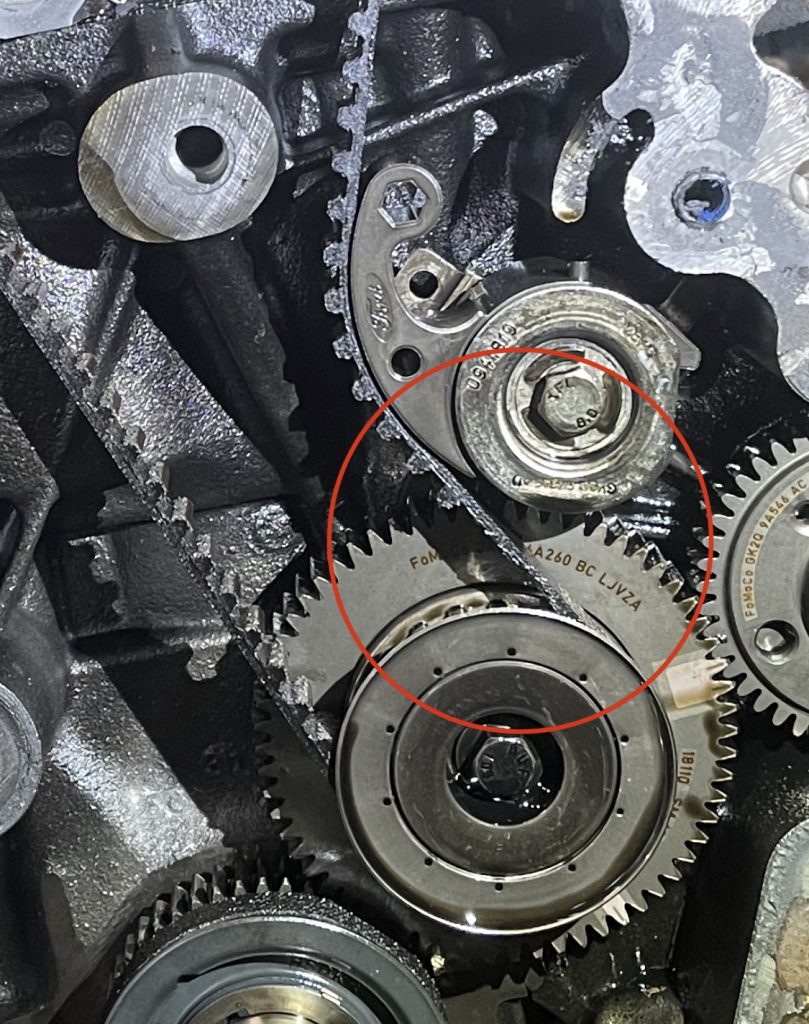
When we removed the wetbelt you could clearly see its poor condition and by gently pinching the belt see the cracks.
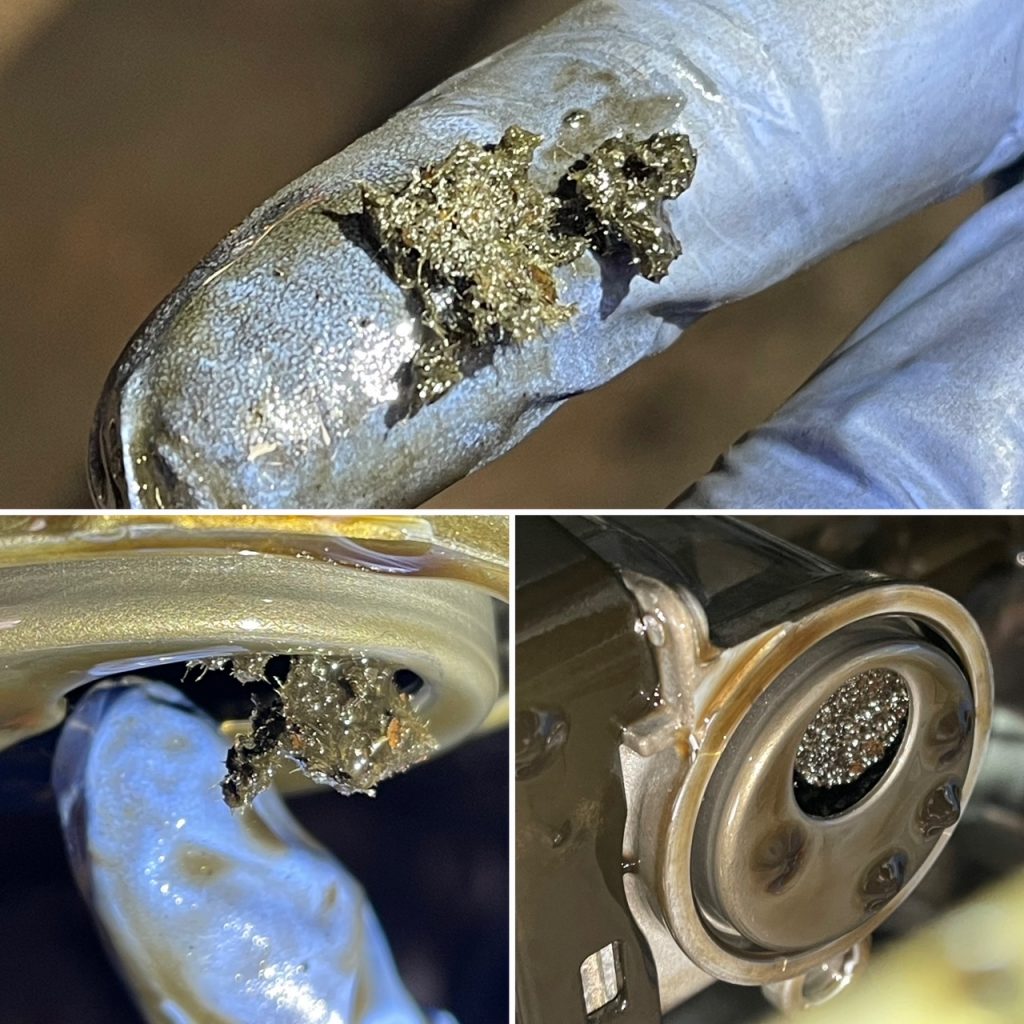
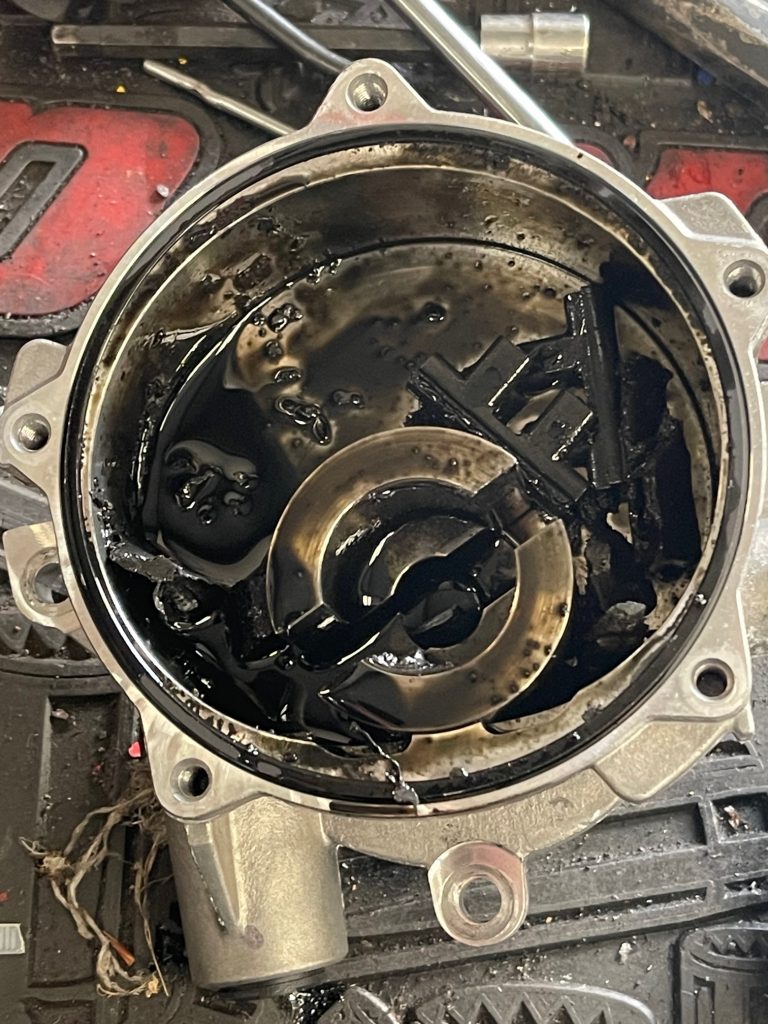
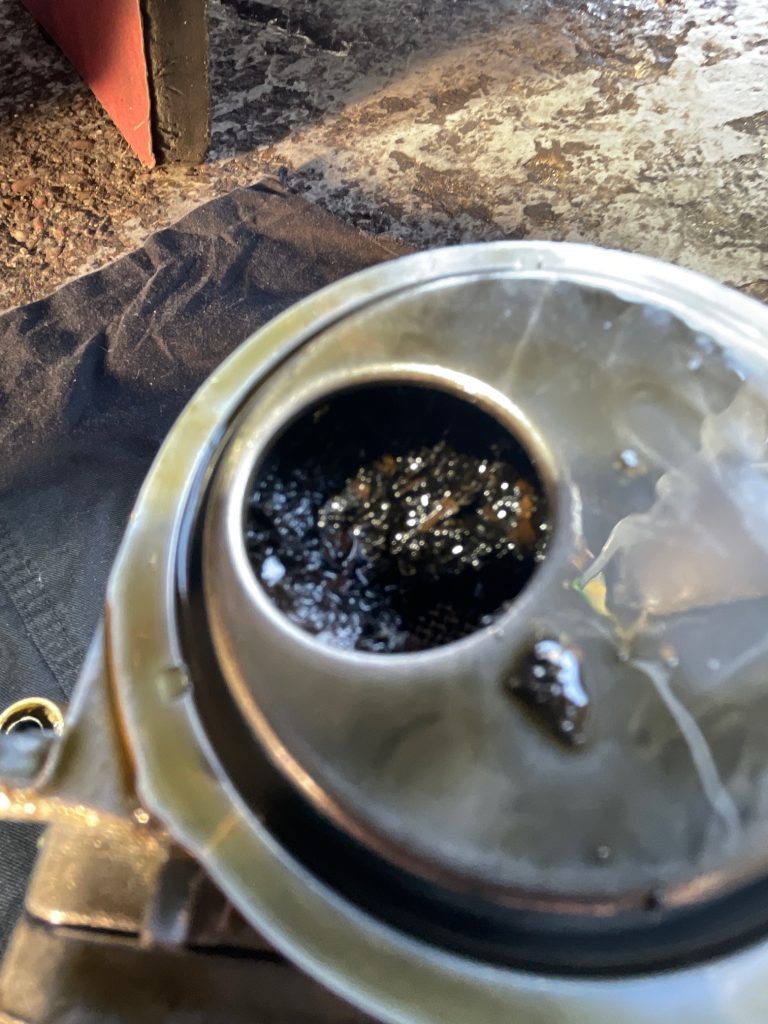
After replacing the wetbelt kit on any vehicle it is good practice to clean out the oil pump pick up due to the rubber debris blocking it and causing oil pressure issues.
Make sure to use the specific oil for the car due to their additives which help prevent premature belt wear.
The Ford 1.0 EcoBoost engine fitted to the Fiesta, Focus, B Max and some Ford Connect vans is ran by a wet belt (runs inside the engine) and Ford recommend it should be replaced at 150,000 miles or 10 years.
This Fiesta was 8 years old and had only done 80,000 miles and you can see by the pictures the condition of the belt and the debris inside the oil pump pick up caused by the failing belt.
Replacing the wetbelt and oil pump belt is a time consuming job, you have to remove about 90% of the engines ancillaries to be able to access the wet belt and to be able to fit the timing kit which ensures the new belt goes on in exactly the right place.
Wetbelt strip down process
Remove coil packs, fuel rail and rocker cover
Remove AC compressor, AC pipes, alternator and catalytic converter
Drain engine oil, drain coolant, remove drive shaft, starter motor and sump
Remove water pump and aux belt tensioner
Rotate engine to TDC and fit crank timing tools and flywheel locking tool
Fit camshaft timing tools
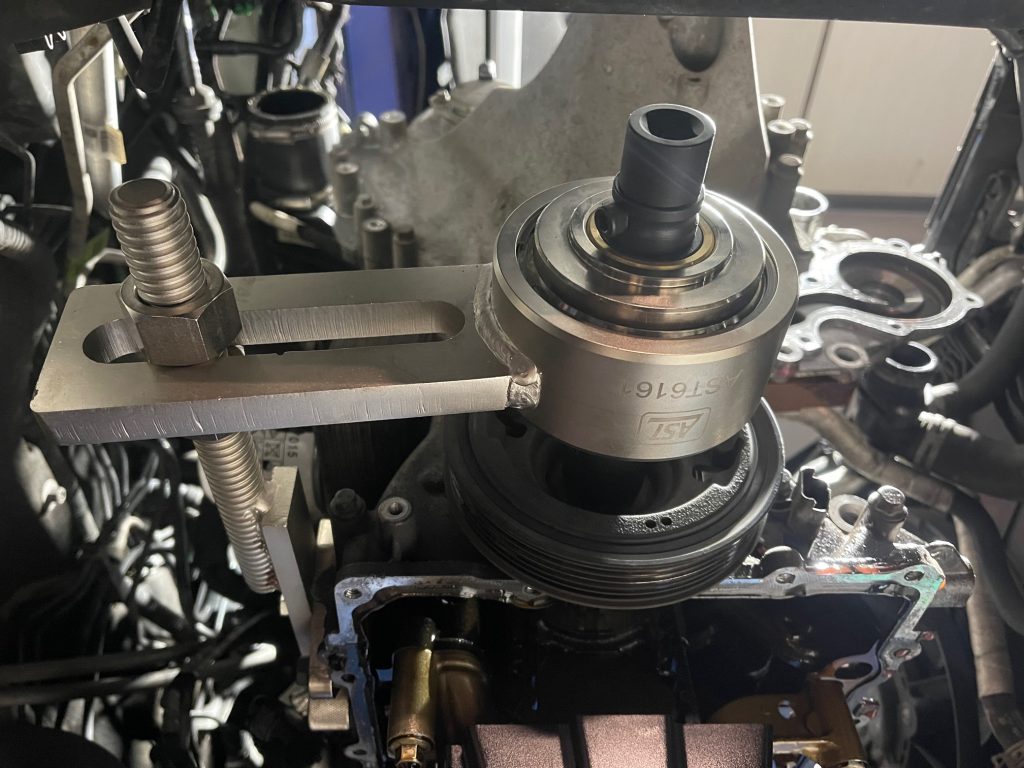
Remove crank pulley using a Torque Multiplier
Remove front engine cover
Remove wetbelt, oil pump belt and oil pump and inspect
Normally we can just clean out the oil pump pick up but in this case we decided it would be a good idea to replace the oil pump whilst it was stripped down because it was so bad.
There are several other seals and washers we replace when rebuilding the engine such as the block to front cover seal behind the water pump and the crank bolt friction washer (Ford advise fitting this due to early problems of crank slip).
Wetbelts are becoming a big problem in all makes and models of vehicles and we advise you get yours replaced well before the recommended interval to reduce the chance of failure.
Our customer brought his Ford Transit Custom to us with the clutch pedal a lot higher than it should be but the biting point was still ok?
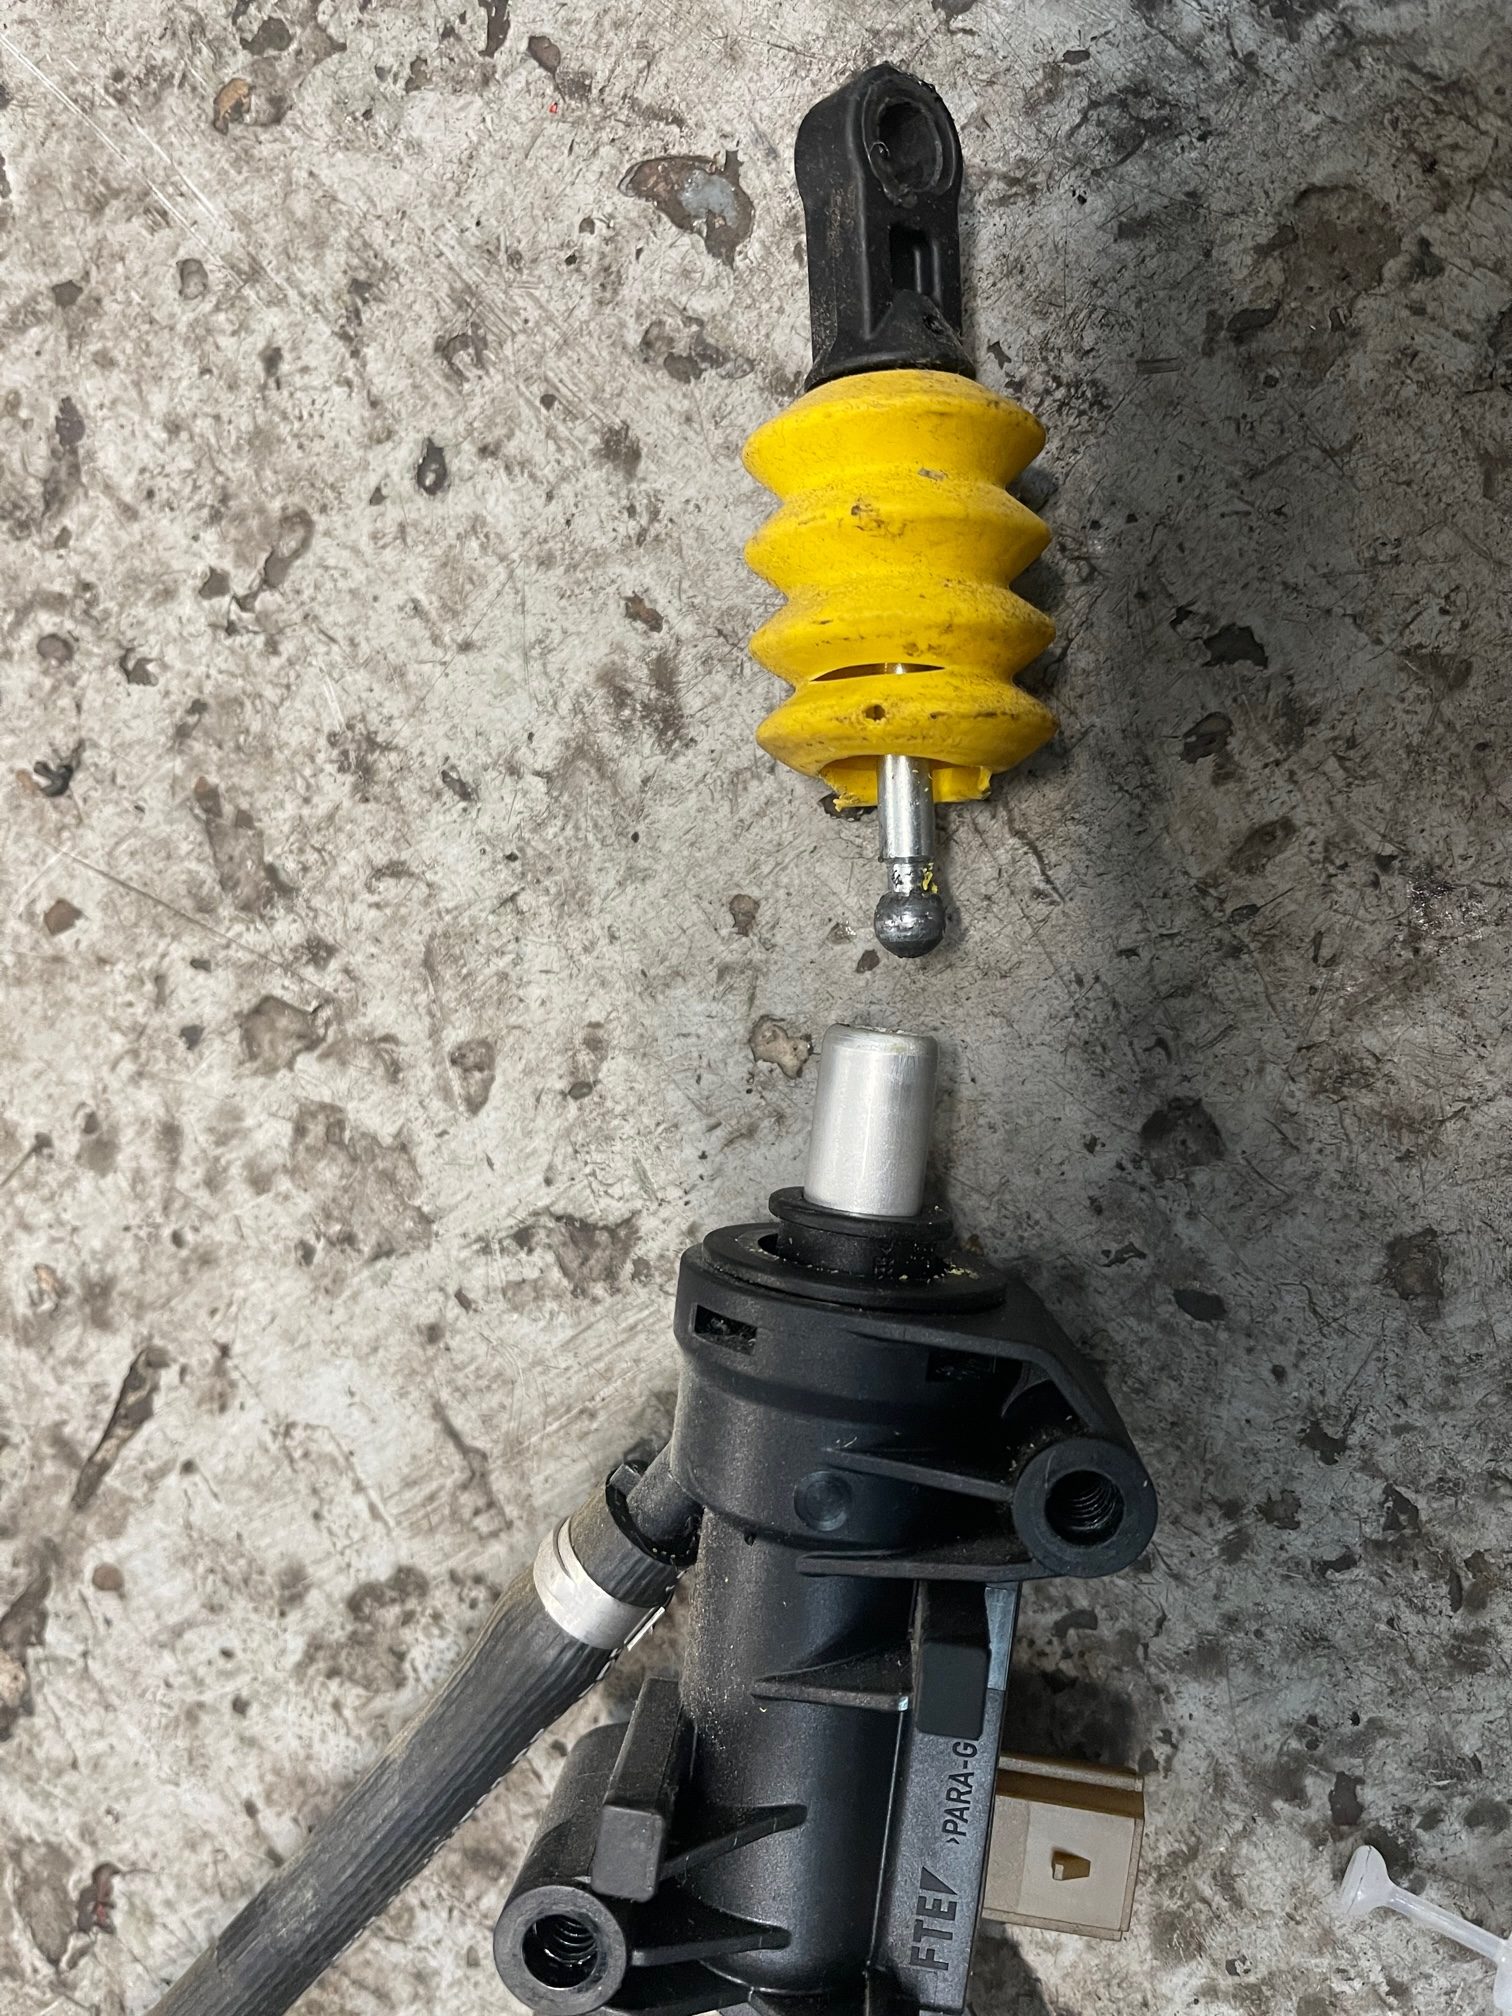
A lot of cars and vans have a ‘stop’ for the clutch pedal in the form of a bracket or a rubber but in the case of the Transit Custom it is built into the Clutch Master Cylinder itself.
Once we had removed the Master Cylinder we could see that the operating arm inside had broken allowing the return spring to make the pedal sit high.
When we replaced the clutch master cylinder and bled the hydraulic system we could see the pedal was now sitting in its correct position and felt a lot more natural to drive.
This Ford Transit was recovered into us after breaking down on the M5, the customer said he suddenly lost all power and pulled into a laybuy.
After a quick investigation it was very apparent that the van had no compression and we suspected the wet belt had failed causing the crank shaft to keep turning without the cam shafts which has caused internal damage.
We removed the front end of the van including head lamps, radiator and bumper to allow easy access to the wet belt cover.
Once we removed the cover we could see that the wet belt had indeed failed, several teeth were missing from the belt which had allowed the crank and cam shafts to turn separately and caused piston and valve contact.
Check your timing belt history! We recommend 80,000 miles or 8 years.
Teeth missing from wet belt
With a quick inspection of the damaged parts we decided it would be cheaper for the customer to fit a reconditioned engine than for us to repair his damaged engine.
Ford are aware of the premature failure of their Wet Belts which on this model were due at 150,000 miles or 10 years but as far as we are aware they are offering no help if the vehicle is out of warranty.
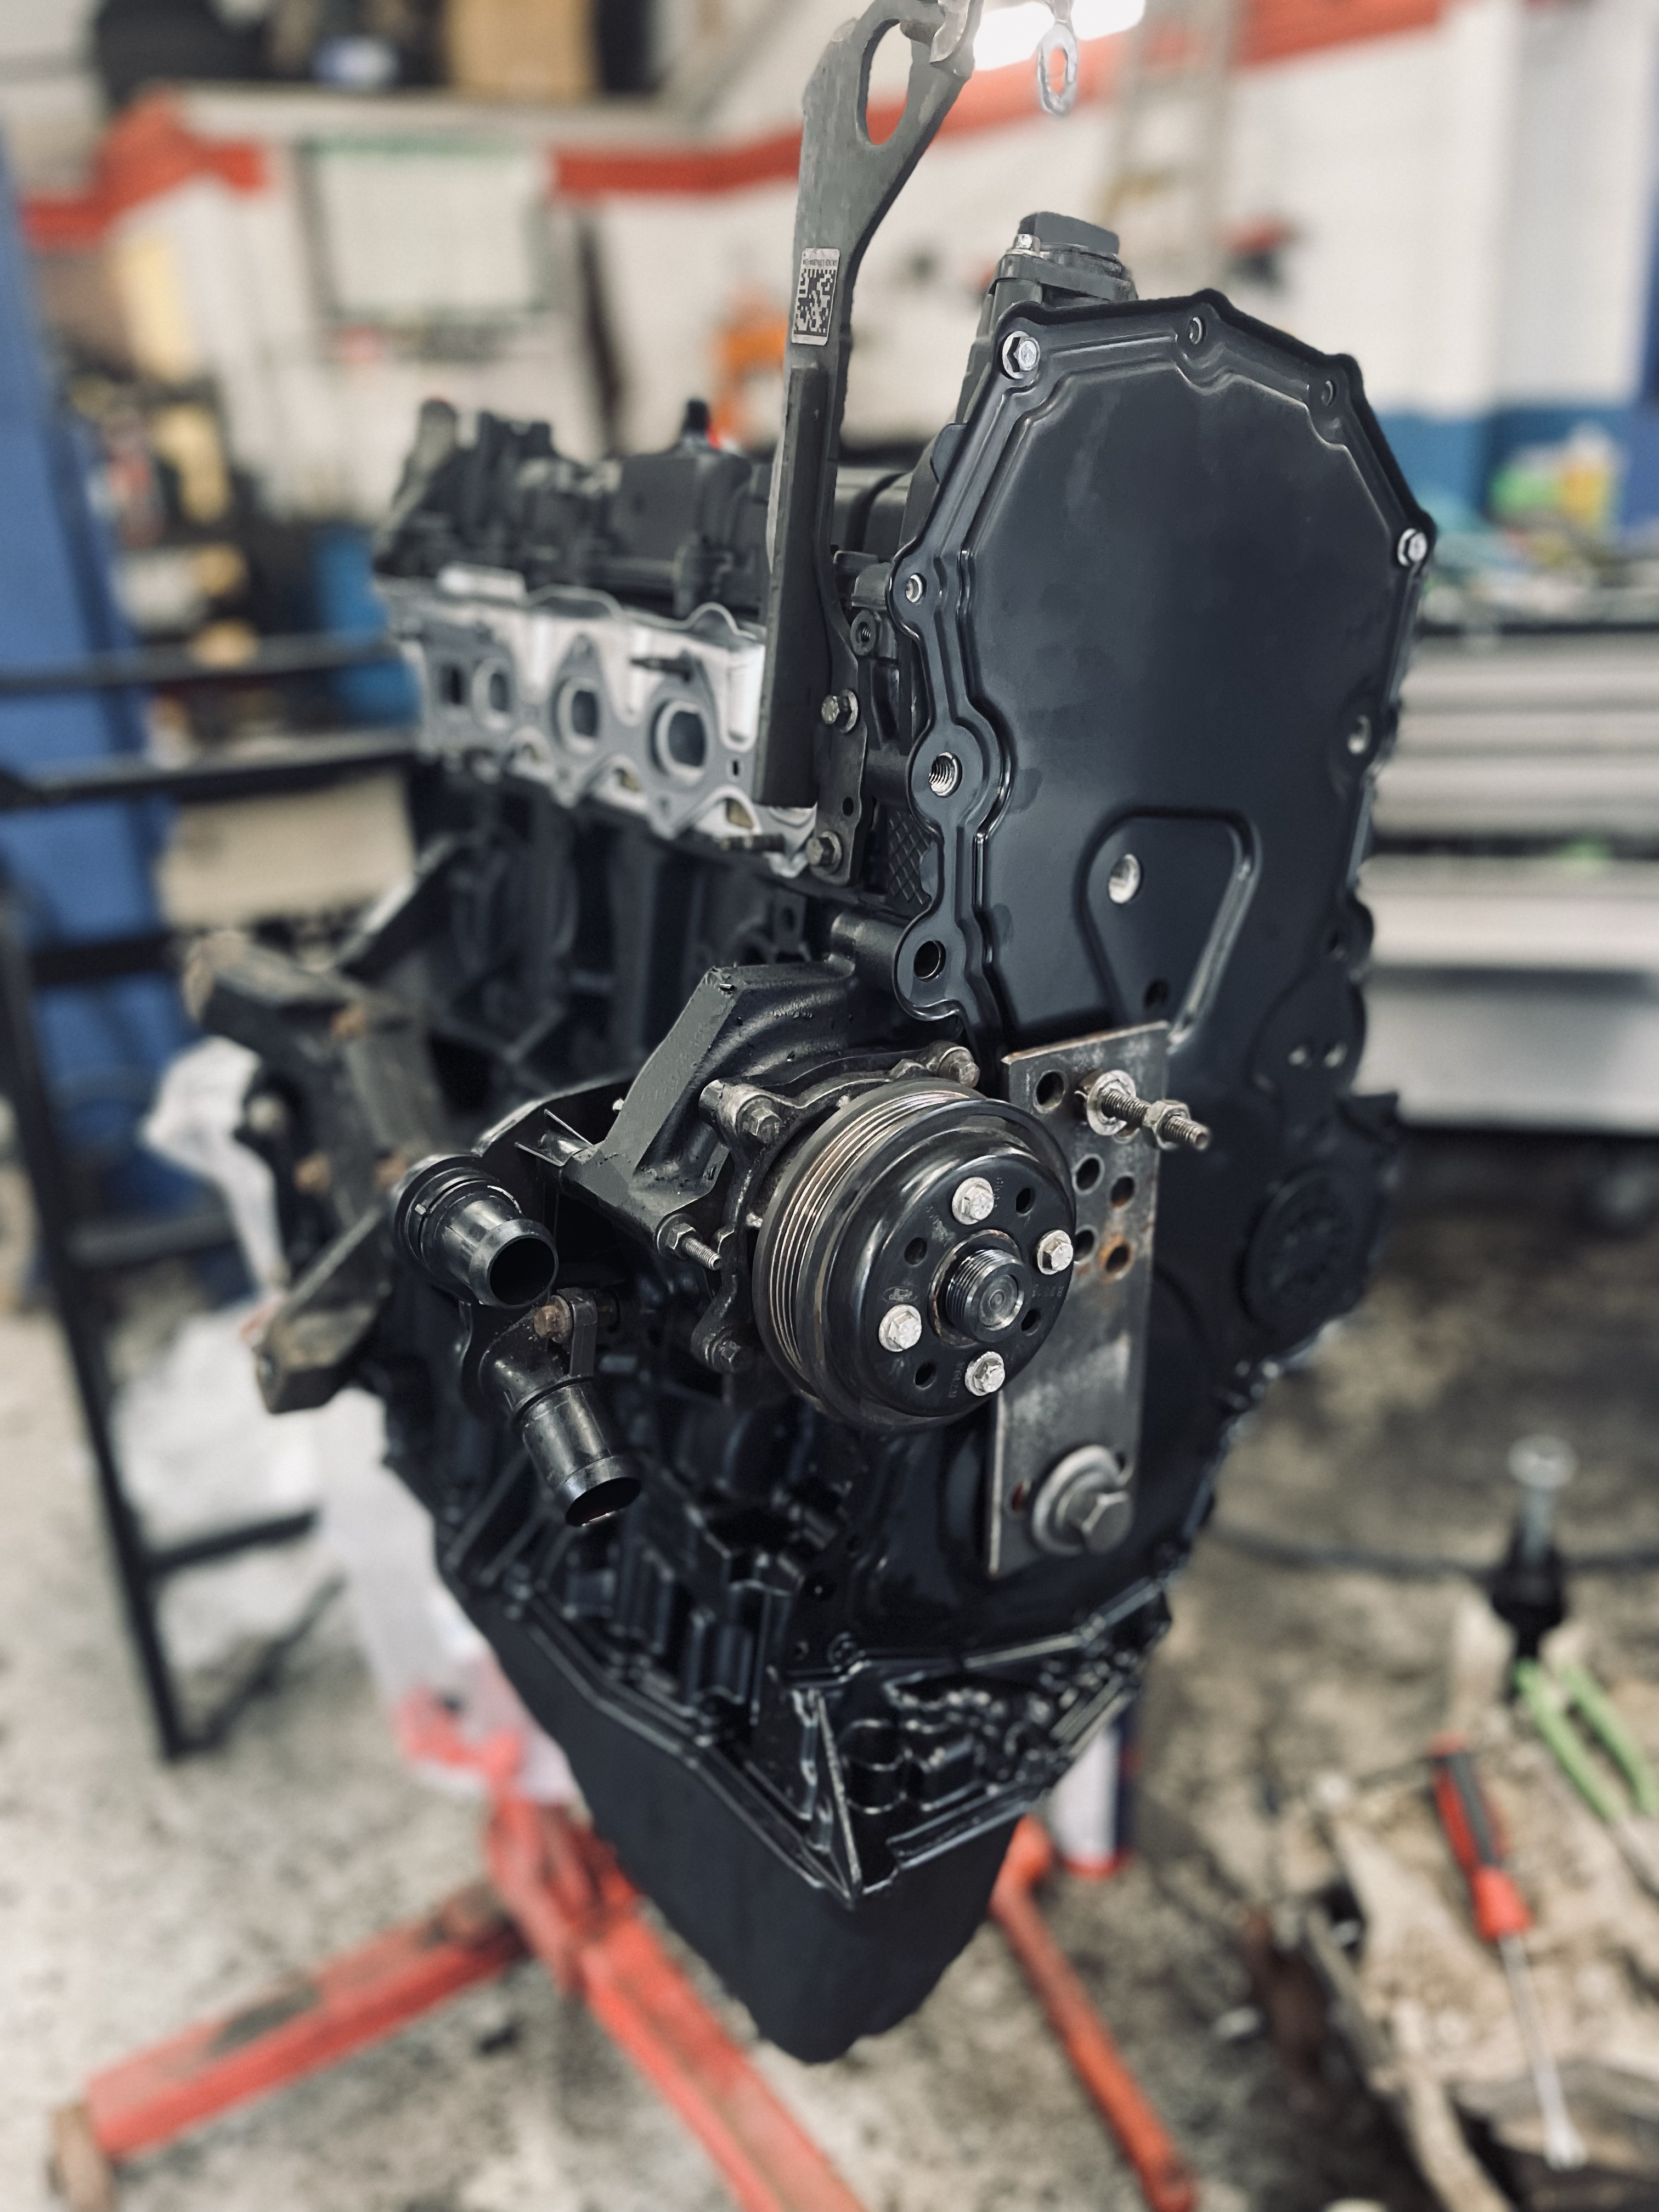
When the new engine arrived we started swapping all auxiliary parts from the old engine to the new engine carefully inspecting for damage or wear in the process, all gaskets and seals were replaced at the same time.
Reconditioned engine from Ford
With the engine and gearbox built up it was time to refit them into the van and get to a stage where we can run the engine and test for any leaks or blows before refitting the front end.
Starting an engine after such a big job is always an intense feeling no matter how confident you are, but after checking and double checking we were happy with our work and we turned the key…….. and voila, life.
We left the engine running for some time to allow the oil and coolant to get up to temperature and so we could check for any problems.
All good so time to refit the front end and road test, after the road test we recheck all levels and hand back to the customer.
This Ford Transit 2.0 EcoBlue TDCI came into us with a complaint of excessive oil leaks, high crankcase pressure and intermittent white smoking.
When you removed the oil filler cap there was an excessive amount of pressure and white smoke coming from inside the rocker cover and also from the breather pipe going to the inlet pipe.
On this Puma engine to be able to remove the rocker cover you must first remove the diesel injectors and when we did the problem became apparent.
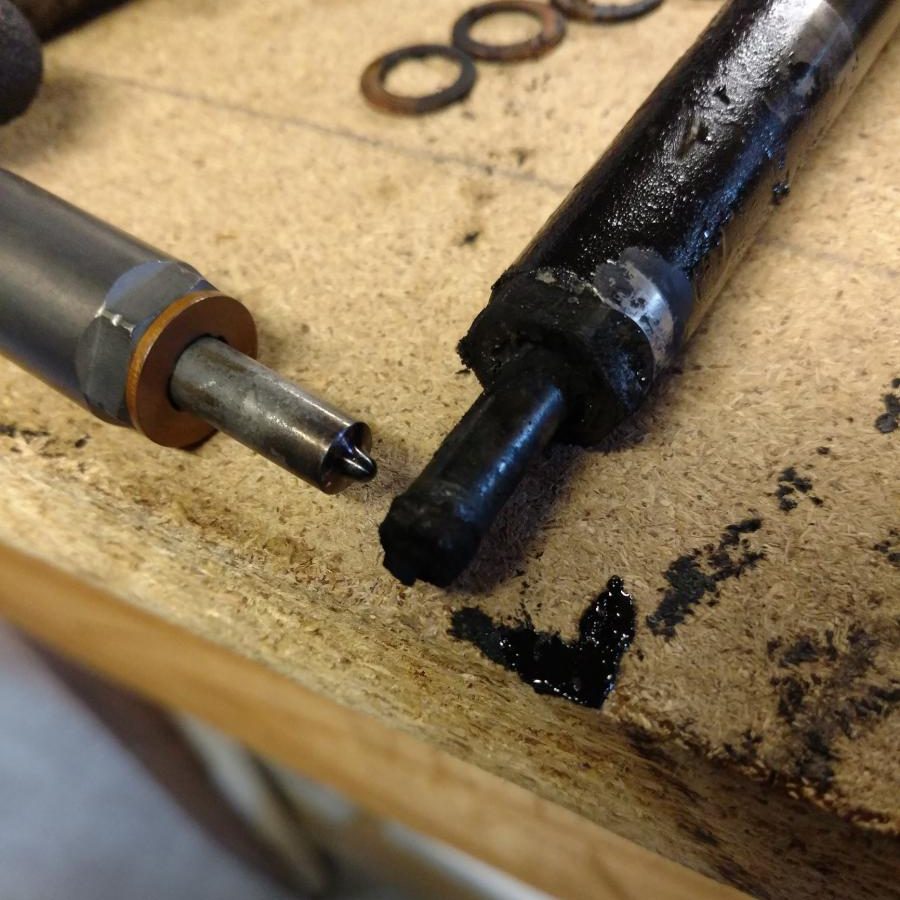
what had been happening was that the injector to cylinder head copper sealing washers had failed and was allowing the combustion gases to enter the engine which was causing the high crankcase pressure.
Injector blowing past copper sealing washer
The high crankcase pressure is also what we believe was causing all the oil leaks on the engine, the engine was trying to find the easiest way to relieve the pressure, either a weak seal or weak gasket would allow the engine to release pressure and oil hence ‘oil leak’
How to resolve the issue.
With the injectors removed we removed the old copper seals and cleaned the body of the injectors using a wire wheel, making sure not to touch the tip of the injector as modern injector nozzle holes are so fine any attempt to clean them normally causes damage.
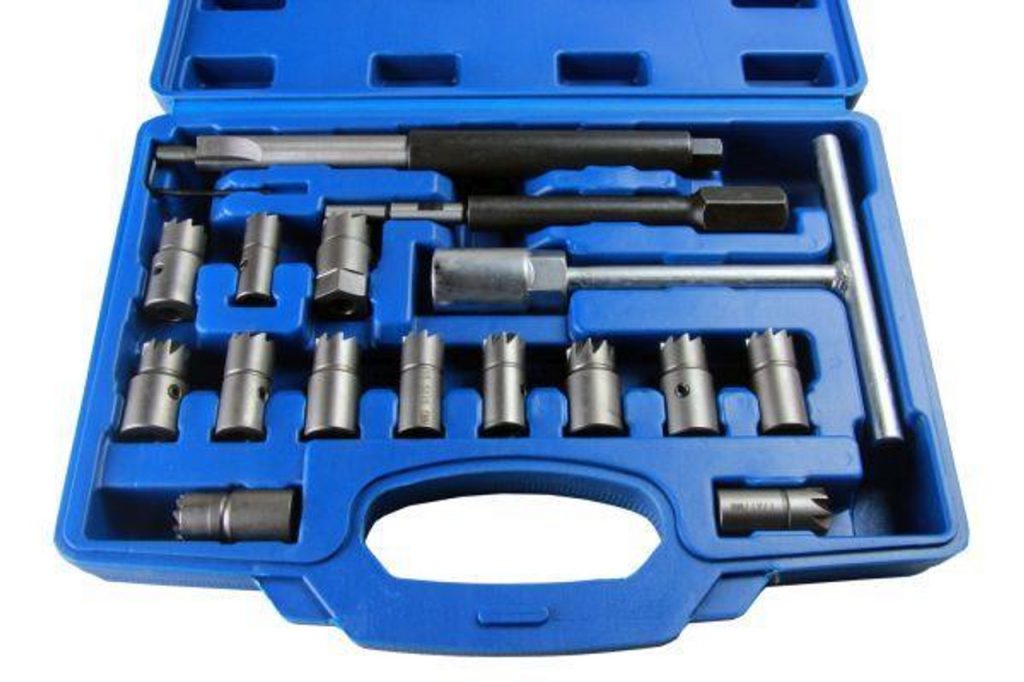
Using an injector seat cutting tool we cleaned the sealing base of the injector and also cleaned the injector holes in the cylinder head making sure to blow out any excess aluminium that the cutting tool may have left in the injector holes.
Injector seat cutting tool
Using a new rocker cover gasket and injector sealing washers (copper) we refitted the injectors making sure to also replace the injector clamp bolts as they are a one time use stretch bolt that require torquing to a specific setting when fitted.
Once rebuilt we started the engine and gave it a few minutes to settle due to having the injectors removed, and instantly we could see by removing the oil filler cap that there was now very little crankcase pressure and no sign of white smoke.
After a long road test the vehicle was returned to the garage to have a final check over for any signs of leaks and for an oil and filter change as the oil would have been contaminated with diesel and carbon deposits from the injectors which had been blowing past and then returned to its owner.
This Peugeot Boxer had a serious engine noise and an engine management light on when it came to us for Service.
Firstly we had to diagnose whether it was from the engine internals or auxiliary items such as air con compressor water pump etc.
Once we had determined it was indeed from the engine we needed to strip down to find out what was causing the noise
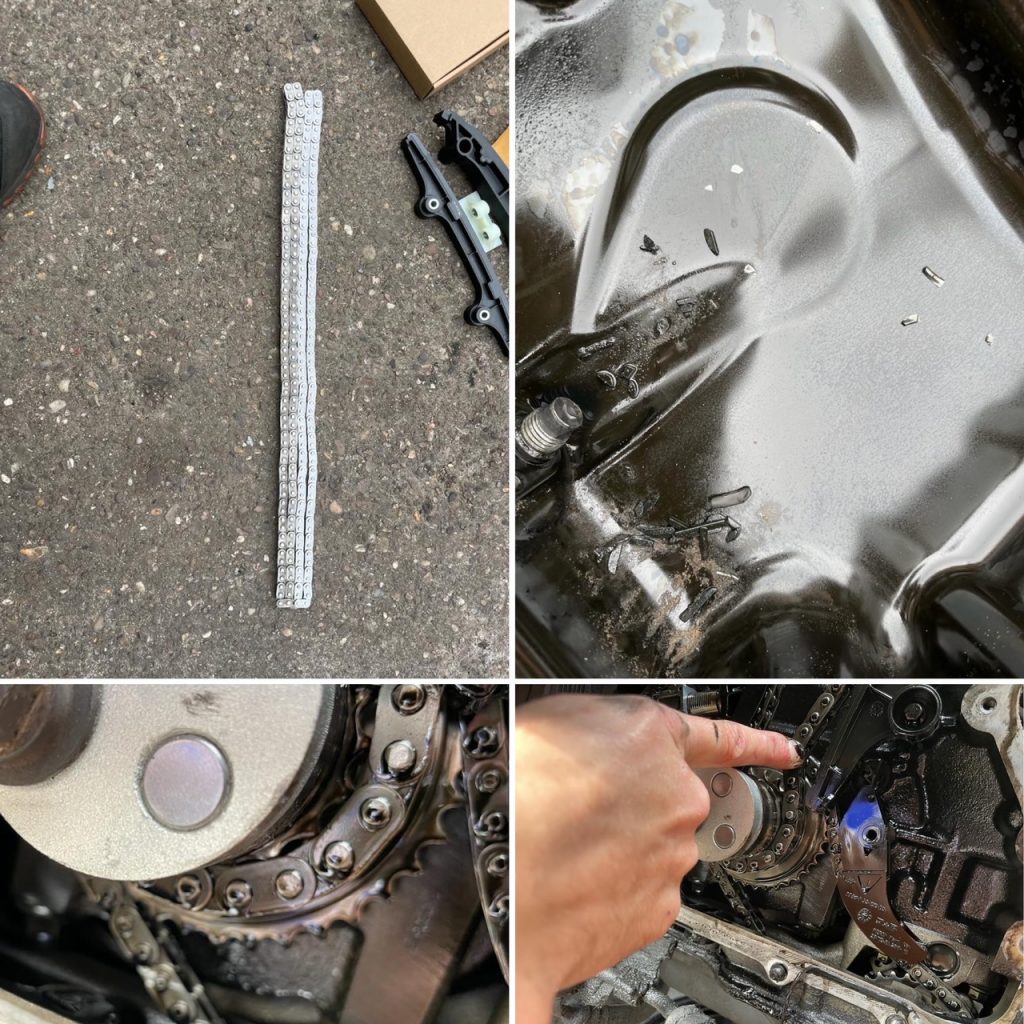
After removing the timing chain cover it became pretty obvious what was causing the noise, the chain had stretched so much that the adjuster was fully out and the chain was still loose.
Peugeot Boxer Timing Chain Stretched
After removing the chain we compared it to the new chain and it was a full link longer, the teeth on the crank gear had become rounded and all the chain guides were starting to break apart (debris in the sump).
When we fitted the timing tool to the engine prior to removing the chain we could see that the stretched chain had allowed the timing of the engine to be out by a full tooth.
With the new timing chain kit fitted to the engine and all debris removed we treated the engine to a new oil filter and some fresh oil and gave the key a turn.
The difference was night and day, the engine ran smooth with no worrying clattering and rattling just ticking over like it should.
A quick code scan with our diagnostic machine tells us that all the fault codes relating to the stretched timing chain have gone.
Time for a good road test, final check and hand back to the customer.
This Mercedes A200d with the 2.1 diesel engine came into us for a Diagnostic Code Read because its EML (Engine Management Light) was on.
The Codes were –
P0401 Exhaust gas recirculation (EGR) system – insufficient flow detected
P0638 Throttle actuator control (TAC), bank 1 – range/performance problem
P200A Intake manifold air control actuator, bank 1 – performance problem
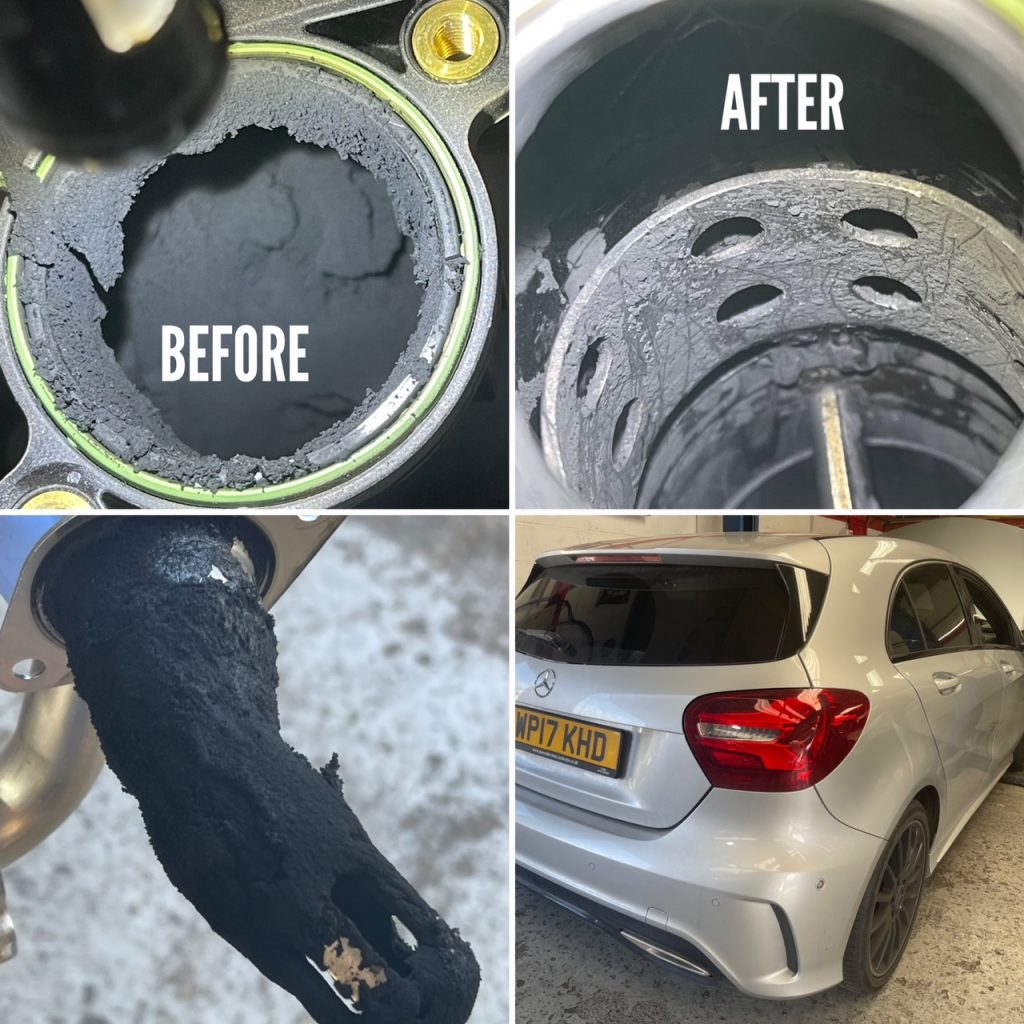
After checking some of the live data we decided to remove the EGR pipe to have a look inside the intake system, the system was full of carbon build up which was causing blockages.
After speaking to the customer we found that he only uses the car for short journeys and it very rarely gets a long run.
We are seeing this as a weekly occurrence at the moment, modern diesel engines are not designed for lots of short journeys they are more designed for long distance commuting.
When a modern diesel engine is driven on a long journey it carries out a DPF (Diesel Particulate Filter) regeneration which basically means it cleans out the exhaust system of carbon and soot build up, the same carbon and soot is found in the engine and long journeys help to clean that too.
Once we had cleaned out the intake and EGR system we cleared all stored engine codes and took the Mercedes for a long road test, upon return we carried out another Diagnostic code read and none of the codes had returned and all live data was reading correctly.
The car was given back to its owner and we also advised him to go on at least one long drive per week or the car would be back to us with the same fault.
This Audi TT was brought into the Garage with its Engine Management Light (EML) on, after carrying a Diagnostic Code Read we could see numerous codes in its ecu the main one for us was P00b7 which related to poor coolant flow!
When checking the live data we could see that the engine coolant temperature sensor was reading at over 100 degrees whilst the radiator temperature sensor was at a stable 40/45 degrees even after a road test.
The cooling system on this car is controlled by an electronic thermostat which is built into the back of the water pump housing located under the inlet manifold.
To access the water pump housing we removed the inlet manifold for ease, once the manifold was off we removed the water pump and housing for inspection.
inlet manifold and water pump removed
When we removed the cover off the electronic thermostat we could see that the gear on the operating motor had broken off meaning that it couldn’t open the thermostat.
operating gear missing from motor
The Fix
Using genuine Audi parts we replaced the water pump and water pump housing along with its drive belt then rebuilt the engine so that we could retest for operation.
After running the engine up to temperature we rechecked our live data, the engine temperature sensor was now reaching 98 degrees and then dropping as the thermostat opened and we could see the radiator temperature increase too.
Once the car had been road tested and rechecked for leaks it was handed back to its owner.
This Audi A5 was brought into us barely running by a customer for our diagnosis.
We had to push the car into the Garage as it would no longer start! Firstly we carried out a diagnostic code read to see if that would point us in the right direction but there were lots of codes stored and it was hard to know what were old codes and which were relevant codes, however there was a code for ‘Camshaft and Crankshaft Incoherence‘ which normally means the timing chain has jumped teeth.
We decided to carry out a compression test before stripping the engine completely, the compression’s were all low but were similar across all four cylinders.
Once we had removed the front bumper, head lights, radiator and other ancillaries we could now access the timing chain cover. Time to remove the covers and see if the timing is out.
The fault
The timing was at least three teeth out on the exhaust camshaft which is more than enough to stop the car running and lucky enough not to cause any serious internal damage.
We check the timing using specific timing kits as shown below.
Timing Tool
This car also has two balance shafts which are ran by a separate timing chain which is also replaced as part of this job.
Balance shaft chain behind main chain
We need to lock both camshafts and the crankshaft into their timed positions using the timing tools before we start fitting the new guides and chain, once the chain is fitted we can release the new tensioner’s and remove any slack out of the chain.
Now we rebuild the engine using new gaskets where required until it is in a position to be turned over by hand, turn the engine twice by hand and recheck the timing marks all ok.
Next we replaced the oil and filter before building up the front end of the car (just in case we need to strip it again).
Time to start the engine, I don’t care how long you have been in this trade it is still a scary time when you first turn that key on a rebuilt engine!
But, first turn and it fired up and ran perfectly.
Now time to rebuild the front end top up coolant levels and road test, the engine ran beautifully and was returned to a happy customer.
We have seen quite a lot of Timing Chain faults recently across different manufacturers from Nissan and Renault to Audi and Volkswagen.
The faults range from chains stretching and causing the Engine Management Light (EML) to come on to chains slipping and causing poor running and in some cases non start.
There is a lot of speculation as to why the chains in modern cars don’t seem to last as long as their predecessors such as poor oil quality, poor design, poor materials etc…..
What we can say is this problem is becoming more and more common and it is something you cannot ignore, if your engine starts to get a rattle that was not there before or your EML comes on and you have codes for‘Incoherence between Cam and Crank Sensors’ make sure to get it into the garage to be checked out before it does any serious damage.
Here we have a picture of the timing chain cover from a 2016 Nissan Pulsar that had recently started to rattle, as you can see the chain was so loose it was starting to catch the top of the chain cover and wear it away.